
Introduction
Welcome to the wonderful world of crochet! If you have ever looked at a beautiful, textured handmade blanket or a dainty pair of baby booties and wished you could create something just as lovely, you are in the right place. There is something truly magical about taking a simple ball of yarn and a single hook, and through the rhythmic motion of your hands, transforming it into a piece of art that holds warmth, love, and your unique creative touch.
Among all the stitches you will encounter in your crafting journey, there is one that acts as the foundation for almost everything else: the single crochet stitch. It is the bread and butter of the crochet world. It is sturdy, versatile, and elegant in its simplicity. Many beginners feel intimidated by the idea of learning a new craft, but I want to reassure you that you are perfectly capable of mastering this. Crochet is a gentle, forgiving hobby that invites you to slow down and create something tangible. Whether you are looking to make cozy home decor, precious gifts for loved ones, or your very first piece of clothing, mastering the single crochet stitch is your golden ticket. Let’s embark on this peaceful, creative journey together, one loop at a time.
Quick Overview
This guide is designed for anyone standing at the threshold of their crochet journey. You will learn the anatomy of the single crochet stitch, how to hold your tools with ease, and the essential mechanics of building your very first rows. This guide is for:
- Absolute beginners who have never held a crochet hook before.
- “Returning” crocheters who need a refresher on the fundamentals.
- Anyone looking to refine their technique for more professional-looking, even edges.
Understanding this stitch is essential because it is the primary building block for amigurumi (crochet stuffed toys), dense and warm blankets, and structural garment construction. It is a foundational skill that will serve you for years to come.
Materials or Tools Needed
To get started, you do not need an expensive investment. Keep it simple and focus on comfort.
- Yarn: For your first time, choose a light-colored, worsted-weight yarn. Light colors (like cream, soft pink, or light blue) make it much easier to actually see your stitches, which is vital when you are learning where to insert your hook. Aim for a smooth, acrylic or cotton blend; avoid “novelty” or “fuzzy” yarns until you have more experience.
- Crochet Hook: A size H/8 (5.0 mm) hook is the classic “learning” size. It is large enough to handle easily but small enough to produce a nice, tight fabric. Look for a hook with a comfortable, ergonomic grip if you can.
- Stitch Markers: These are small, colorful plastic clips that help you track the first and last stitch of your row. They are the best insurance policy against accidental stitch loss.
- Scissors and a Yarn Needle: Any sharp scissors will do, and a blunt-tipped yarn needle (often called a tapestry needle) will be used later for finishing your work.
Crochet Terms, Stitches, and Key Concepts
Before we dive into the movement, let’s get comfortable with the language of crochet. Using standard U.S. terminology—which we use here—is important because it helps you read almost any pattern you find online.
- Slip Knot: The starting loop that anchors your yarn to the hook.
- Chain (ch): The foundation sequence of loops used to start most pieces.
- Single Crochet (sc): The stitch we are learning, which creates a tight, dense fabric.
- Yarn Over (yo): The act of wrapping the yarn over your hook from back to front.
- Turning: Flipping your work to begin the next row.
- Gauge: This refers to the number of stitches and rows per inch, which determines the final size of your item.
Helpful Notes Before You Start
Crochet is largely about muscle memory. Do not get discouraged if your first few attempts look a little uneven; that is simply the “learning curve” that every single master crafter has gone through.
- Tension: This is the most common hurdle. If your hands feel cramped or your hook is hard to push through the stitches, you are holding the yarn too tightly. Relax your shoulders, take a deep breath, and try to keep a loose, rhythmic grip.
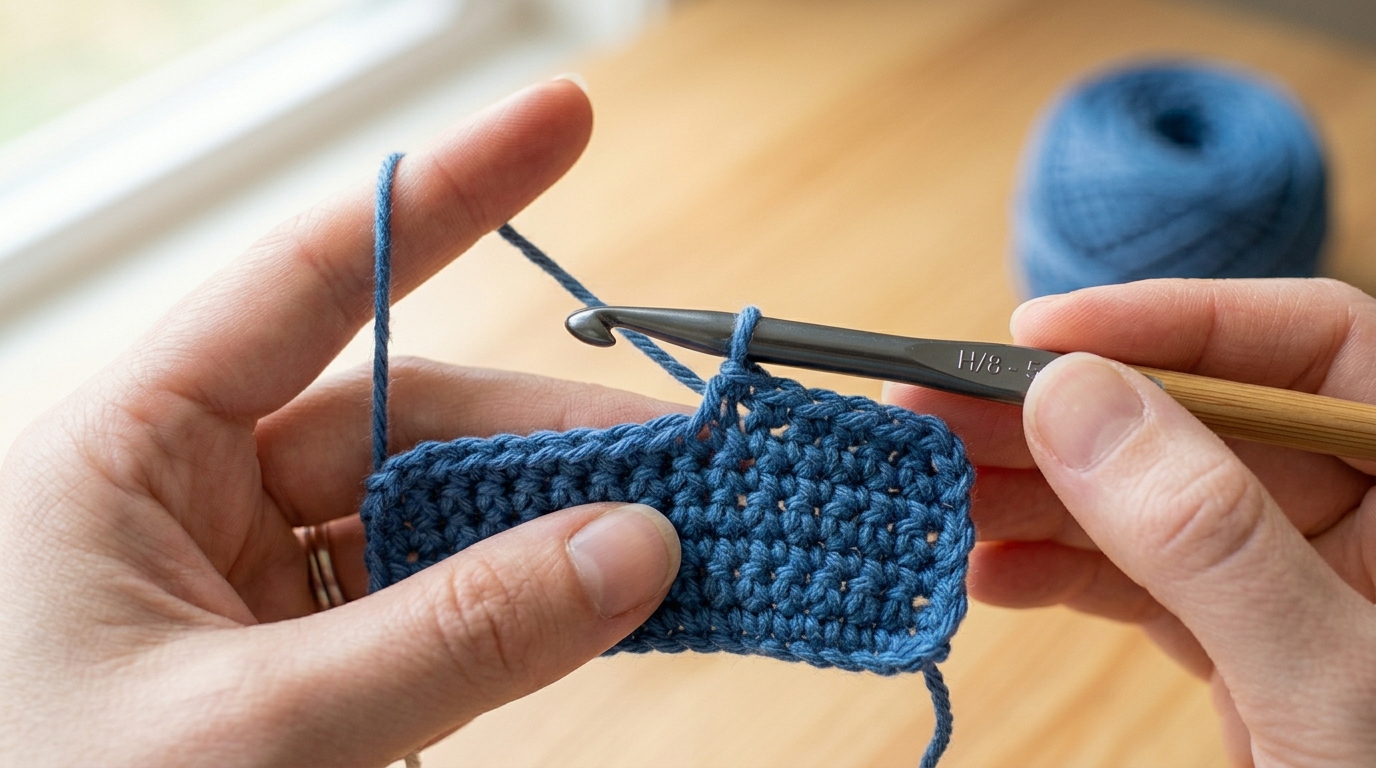
- The “V” Shape: When you finish a single crochet stitch, look at the top of your work. You will see a series of small “V” shapes. This is the anatomy of your stitch. Always aim to insert your hook under both legs of that “V” unless a pattern specifically tells you otherwise. This ensures the structural integrity of your piece.
Learning the Single Crochet Stitch
We will break this down into digestible stages so you can move at your own pace.
Step 1: The Foundation Chain
Start with a slip knot on your hook. Hold your hook in your dominant hand, and use your non-dominant hand to tension the yarn. Wrap the yarn over the hook (yarn over) and pull it through the loop on your hook. This is one chain. Repeat this until you have a chain of 15. This is your foundation.
Step 2: Inserting the Hook
Moving to the second chain from your hook, insert the hook through the center of the chain stitch. You should have two strands of yarn on top of your hook and one on the bottom (or just one strand on top, depending on which part of the chain you catch).
Step 3: The Yarn Over and Pull Through
Wrap the yarn over your hook (yarn over) and pull that loop back through the chain stitch. You will now have two loops sitting on your hook.
Step 4: Completing the Stitch
Yarn over again and pull through both of those loops currently on your hook. Congratulations! You have just completed your first single crochet stitch. There should be one loop remaining on your hook. Repeat this process in every chain until you reach the end of your row.
Step 5: Turning for the Next Row
To start the next row, chain one (this is called a “turning chain”), turn your work clockwise, and begin inserting your hook into the first stitch of the previous row. Be sure to go under both parts of the “V” at the top of the stitch.
Common Mistakes to Avoid
Even seasoned crocheters occasionally trip over these common errors. Being aware of them will save you hours of “frogging” (a fun crochet term for ripping out your stitches).
- Skipping the First Stitch: This is the #1 reason why beginners find their rows getting smaller every time they turn them. The first stitch can sometimes look like part of the turning chain. Use a stitch marker to mark the first stitch of every row until your eyes are trained to spot it instantly.
- Working Too Tightly: If your project is curling or bending, it is likely because your tension is too tight. Try using a slightly larger hook, or consciously remind yourself to let the yarn “flow” through your fingers.
- Working into the Turning Chain: Beginners often accidentally crochet into the turning chain itself, which adds extra stitches and turns a rectangle into a triangle. Remember, the turning chain is just a “ladder” to get to the next row height; it is usually not a stitch itself.
Pro Tips for a Better Result
If you want your projects to look polished, professional, and lovely, keep these secrets in mind:
- Count Your Stitches: It might feel tedious, but counting your stitches at the end of every row ensures your edges stay perfectly straight. It is better to spend 10 seconds counting now than 10 minutes trying to figure out why your blanket is crooked later.
- Consistent Tools: Try to stick with the same style of hook while learning. Bamboo hooks have a bit more “grip” and are great for beginners, while aluminum hooks are smooth and faster.
- Natural Lighting: Always work in good, natural light. This reduces strain on your eyes and makes it much easier to identify the anatomy of your stitches.
- The “Pinch” Method: Hold your project near the work area with your thumb and middle finger. This helps stabilize the fabric and gives your hook a steady target to hit, making the entry into the next stitch much smoother.
Variations and Personalization Ideas
Once you master the standard single crochet, you have essentially unlocked the ability to create almost anything. You can play with variations to add texture and flair:
- Working in the Back Loop Only (BLO): Instead of inserting your hook under both loops of the “V,” insert it only into the back loop. This creates a beautiful, ribbed texture that is perfect for hats and sweaters.
- Color Changes: Want stripes? When you reach your final “pull through” step of the last stitch of a row, drop your current color and pick up a new one to pull through those last two loops. It makes for a seamless color transition.
- Project Size: Start with a simple “washcloth” sized swatch. It is a small commitment, requires only about 50 yards of cotton yarn, and gives you a functional, beautiful home item to use in your kitchen or bath immediately.
Care, Storage, and Next Steps
Once you have finished your first few rows of single crochet, you might decide to “fasten off.” To do this, simply cut your yarn, leaving a 4-inch tail, and pull the tail through the final loop on your hook. Use your yarn needle to weave that tail through the back of your work to hide it.
To care for your future projects, follow the instructions on the yarn label. Most modern acrylics are machine washable and dryable, which makes them perfect for busy families. Natural fibers like wool require gentler handwashing. Store your crochet pieces neatly folded in a cool, dry place, and avoid hanging them for long periods, as some fibers can stretch out over time.
For your next steps, I encourage you to master the “Double Crochet” next. It is taller and creates a more “drapey” fabric, which is the perfect companion to the sturdy warmth of the single crochet.
FAQ
How do I stop my crochet project from getting smaller?
This usually happens because you are missing the last stitch of the row. I highly recommend using a stitch marker in the very first and last stitch of every single row. It acts as a visual signpost, ensuring you know exactly where the row ends.
Why is my crochet looking like a honeycomb or a wave?
If your work is curling or wavy, your tension might be inconsistent or your stitch counts might be off. Try to maintain a “loose” grip on the yarn, and count your stitches at the end of every row to ensure you have the same number you started with.
Is single crochet the same in the U.K. and the U.S.?
No! This is a classic point of confusion. In the U.K., this stitch is actually called a “double crochet.” Always check if your pattern uses U.S. or U.K. terminology before you begin. All patterns on our site follow standard American terminology.
How do I join a new ball of yarn when I run out?
The most secure way is to wait until you are joined by a new strand at the “yarn over and pull through” step of your final stitch. Simply drop the old color and pull the new color through. You can then tie the two ends together in a small knot on the back and weave them in later.
I keep losing my stitch count. Is there a trick?
Yes! Use a stitch marker every ten stitches. You won’t have to count from the beginning every time you lose your place; you can just count the gaps between your markers.
Conclusion
You have just walked through the fundamental step to a lifetime of creativity. Learning the single crochet stitch is like learning to write; once you have the alphabet down, you can write stories, poems, or letters. Whether you choose to make a simple, cozy coaster, a warm scarf for a friend, or a sweet stuffed animal for a baby, everything starts with these very movements you practiced today.
Be kind to yourself as you learn. Your hands are developing a new skill, and like any new movement, it takes a little repetition to feel natural. There is no deadline in crochet. It is a slow, meditative process meant to bring you joy, not stress. I encourage you to grab your hook, set aside fifteen minutes today, and just practice a simple row. You will be amazed at how quickly those loops turn into something you can be proud to show off. Welcome to the fiber arts community—we are so happy you are here!