
Introduction
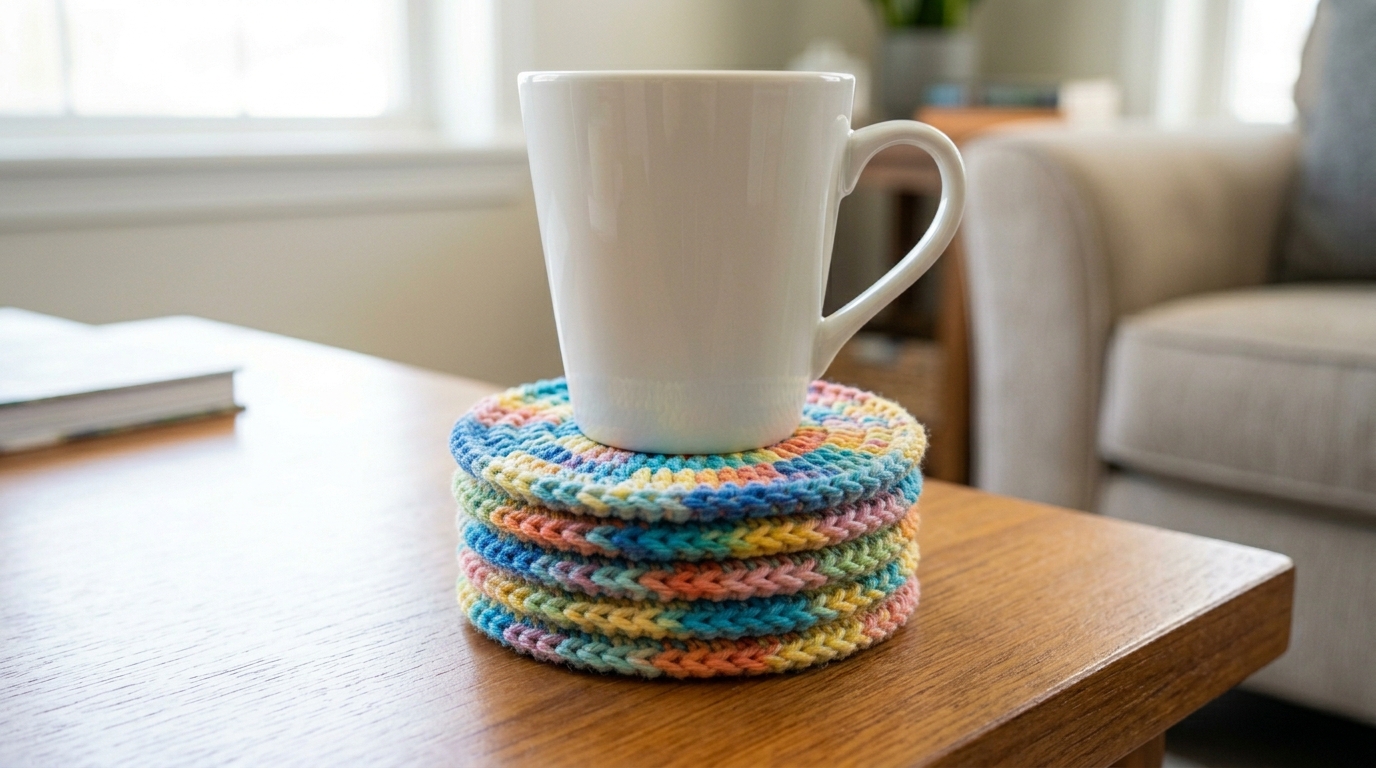
There is something truly magical about the way a simple ball of yarn can transform into something both beautiful and functional for your home. If you have been looking for the perfect weekend project—or just a way to clear out that overflowing basket of leftover yarn scraps—crochet coasters are the answer. They are quick, rewarding, and provide the perfect canvas to experiment with new stitches and vibrant color combinations.
Whether you are a complete beginner just learning how to hold your hook or an experienced crocheter looking for a relaxing, rhythmic project, coasters are a delightful way to refresh your coffee table, desk, or nightstand. Because they work up so quickly, they also make excellent last-minute handmade gifts that feel personal and thoughtful. In this guide, I will walk you through everything you need to know to create your own set of colorful, professional-looking coasters. We will focus on techniques that ensure your projects lay flat every time, look neat, and stand the test of time. Let’s grab our hooks and settle into a cozy spot to start creating!
Quick Overview
This project is perfectly suited for anyone who loves quick wins in their crafting.
- Skill Level: Beginner-friendly.
- Estimated Time: 20 to 30 minutes per coaster.
- Finished Size: Approximately 4.5 inches in diameter, but easily adjustable.
- Best Use: Use them yourself, give them as housewarming gifts, or create a set in seasonal colors for holiday table settings.
- Why You’ll Love It: It is an incredibly low-pressure way to practice stitch tension and color changes without the commitment of a large blanket. It’s also the ultimate stash-buster for those little bits of worsted weight yarn left over from larger projects.
Materials or Tools Needed
To create these cheerful coasters, you don’t need a complex array of expensive tools. You likely have most of these in your kit already!
- Yarn: Medium-weight cotton yarn is highly recommended. Cotton handles moisture better than acrylic and holds its shape beautifully for coasters.
- Crochet Hook: A size H/8 (5.0 mm) hook is ideal for most worsted-weight cotton yarns. If you find your work is too loose, try going down a hook size to a G/7 (4.5 mm) for a firmer, more “spill-resistant” coaster.
- Tapestry Needle: Essential for weaving in your ends securely. The last thing you want is for your hard work to unravel after a few uses!
- Stitch Marker: Extremely helpful for keeping track of your rounds, especially if you are working in a spiral.
- Scissors: Any sharp pair will do.
Crochet Terms, Stitches, or Key Concepts
Before we dive into the pattern, let’s review the stitches and terms we will use. Everything here is written in standard U.S. crochet terminology.
- Slip Knot: The starting point of your project.
- Chain (ch): The foundation for many projects and a way to increase height.
- Slip Stitch (sl st): Used to join rounds or move across stitches without adding height.
- Single Crochet (sc): A compact, sturdy stitch perfect for creating dense fabric.
- Double Crochet (dc): A taller stitch that works up faster and creates a nice texture.
- Magic Circle: A popular way to start a project in the round, allowing you to pull the center tight so there is no hole in the middle.
- Fasten Off: Cutting the yarn and pulling it through the final loop to secure the work.
- Weave in Ends: The process of hiding your yarn tails securely within the stitches.
Helpful Notes Before You Start
Crochet coasters are all about tension. Because these items will be subjected to sweating glasses and warm mugs, you want your stitches to be relatively tight. Don’t be afraid to pull your yarn a little more firmly than you might for a soft shawl or blanket.
If you are a beginner, remember that it is perfectly normal for your first coaster to look slightly different than your fifth. Consistency comes with practice! If you notice your coaster starting to “bowl” (curl up like a hat), you might need to add an extra stitch in your next round to help it lay flat. Conversely, if it starts to “ruffle” or look like a wavy potato chip, you have too many stitches and should omit one or two in the next round.
The Classic Textured Coaster Pattern
This pattern creates a classic, round, textured coaster that features a beautiful center-to-edge growth.
Part 1: The Foundation
Start with a Magic Circle (or chain 4 and slip stitch to the first chain to form a ring).
Round 1: Ch 2 (counts as the first dc). Work 11 more dc into the ring. Join with a sl st to the top of the beginning ch-2. Pull the tail of your magic circle tight to close the center hole. (You should now have 12 stitches).
Round 2: Ch 2. Work 1 dc in the same stitch. Work 2 dc in each stitch around. Join with a sl st to the top of the first ch-2. (24 stitches).
Part 2: Creating Texture
Round 3: Ch 1. Work 1 sc in the same stitch. Work 2 sc in the next stitch, 1 sc in the next stitch. Repeat from to around. Join with a sl st to the first sc. (36 stitches).
Round 4 (The decorative edge): Ch 1. Skip one stitch, work 5 dc into the next stitch, skip one stitch, 1 sl st in the next. Repeat this pattern all the way around the circle. This will create a lovely little shell-like scalloped edge.
Finishing
Fasten off your yarn, leaving about a 4-inch tail. Use your tapestry needle to weave the tail back and forth through the back of the stitches to secure it. If you used multiple colors, repeat the weaving process for all your color-change ends.
Step-by-Step Explanation
When you look at this project, think of it as growing a circle in layers. In the first round, we start with a small base. By increasing the number of stitches in the second round, we allow the coaster to grow outward.
The most important moment is the transition between the inner rounds and the final scalloped edge. When you start the shell border, you are intentionally skipping stitches. This “skipping” is what creates the little dips between the shells. If you find your shell edges look a bit bunchy, check your tension. Ensure that your slip stitch between the shells is pulled snugly to anchor the fabric. You want the coaster to look like a flat, solid surface, not a ruffled lace circle.
Common Mistakes to Avoid
The most common pitfall for beginners is the “creeping” stitch count. It is very easy to accidentally add an extra stitch when you lose count. Always use a stitch marker at the start of your round so you know exactly where you began.
Another frequent mistake is the “twisted chain” start. If you choose to use the chain-4 method instead of a magic circle, make sure your chain isn’t twisted before you slip stitch it into a ring. If your finished coaster doesn’t lay perfectly flat on your table, don’t be discouraged! This is often due to tension variances. You can often fix this by “blocking”—lightly misting the coaster with water and pinning it flat on a towel until it dries.
Pro Tips for a Better Result
If you want your coasters to be extra special, consider using variegated yarn for the body and a solid matching color for the scalloped border. This creates a high-end, boutique aesthetic.
When working with cotton, remember that it is a heavier, less “stretchy” fiber than wool. Your hands might get a little tired if you crocheted with a very tight grip. Take breaks every fifteen minutes. You’ll find that when your hands are relaxed, your stitches look more uniform and professional. Also, always count your stitches at the end of each round. It’s much easier to fix an error in Round 2 than it is to realize you have the wrong count after you’ve finished the border!
Variations, Examples, or Personalization Ideas
The beauty of this pattern is that it is a blank slate.
- Seasonal Switch: Use forest green and deep red for the holiday season or soft pastels for a spring brunch display.
- The “Double-Thick” Hack: If you have very thin cotton yarn, hold two strands together at the same time to create a thicker, more absorbent coaster.
- Adding Faces: You can embroider a simple smiley face or a little heart on your coaster with leftover black or red yarn for a cute, modern twist.
- Square Coasters: If you want a change of pace, look up the “granny square” method to create an alternative shape that fits perfectly along the edges of a square side table.
Care, Storage, or Next Steps
Because these are made of cotton, they are incredibly durable. If they get a coffee stain or a bit of dust, you can toss them in a mesh laundry bag and wash them in your machine on the gentle cycle. Lay them flat to dry to keep them looking crisp. For storage, you can stack them in a small basket, tie them together with a piece of twine for gifting, or display them in a decorative ceramic bowl when they aren’t in use.
Ready for your next challenge? Once your coasters are done, you’ll have a great feel for working in the round. You might consider trying a slightly larger project next, like a crochet trivet for hot pots or a set of simple, heavy-duty dishcloths!
FAQ
Can I use acrylic yarn for these coasters?
While you can, cotton is much better. Acrylic yarn is plastic-based and can melt if you set a very hot mug on it. It also tends to be slippery, so a glass might slide off the coaster more easily than it would with cotton.
How do I make the coaster bigger?
To expand the coaster, simply keep adding rounds of increases. In general, to keep a circle flat, you increase by 6 to 12 stitches per round, depending on your stitch style. Just ensure your finished piece stays flat on a table.
My coaster is curling up. Did I do something wrong?
Not at all! Your tension is likely just a little too tight, or you haven’t added enough stitches in the last round to accommodate the growth. Try blocking your coaster or adding one extra increase to each round next time.
How do I change colors mid-round?
When you want to change colors, complete the last step of the previous stitch using the new color. Drop the old color and pull through with the new one. Carry the tail of the new color along with you for a few stitches to hide it, or cut it and weave it in later.
How many coasters should I make for a set?
A handmade set of four is standard for a small dining table or coffee table. If you are gifting them, a set of six is a very generous and professional-looking amount that feels like a complete set.
Conclusion
I hope this tutorial has inspired you to clear out those yarn scraps and brighten your home with some handmade charm. Crochet is a wonderful way to slow down, be creative, and produce items that bring a little bit of comfort into our everyday lives. Remember, every stitch you make is an act of creation, and there is absolutely no such thing as a “perfect” coaster—only the one made by your hands, which makes it perfect in its own unique way.
Don’t be afraid to experiment with different colors and textures. Once you master the rhythm of these, you’ll find yourself whipping up a set whenever you need an easy, meditative project or a thoughtful gift. When you finish, take a moment to admire your work, set your favorite mug on your new creation, and enjoy the cozy atmosphere you’ve just helped cultivate. Happy crocheting!