
Introduction
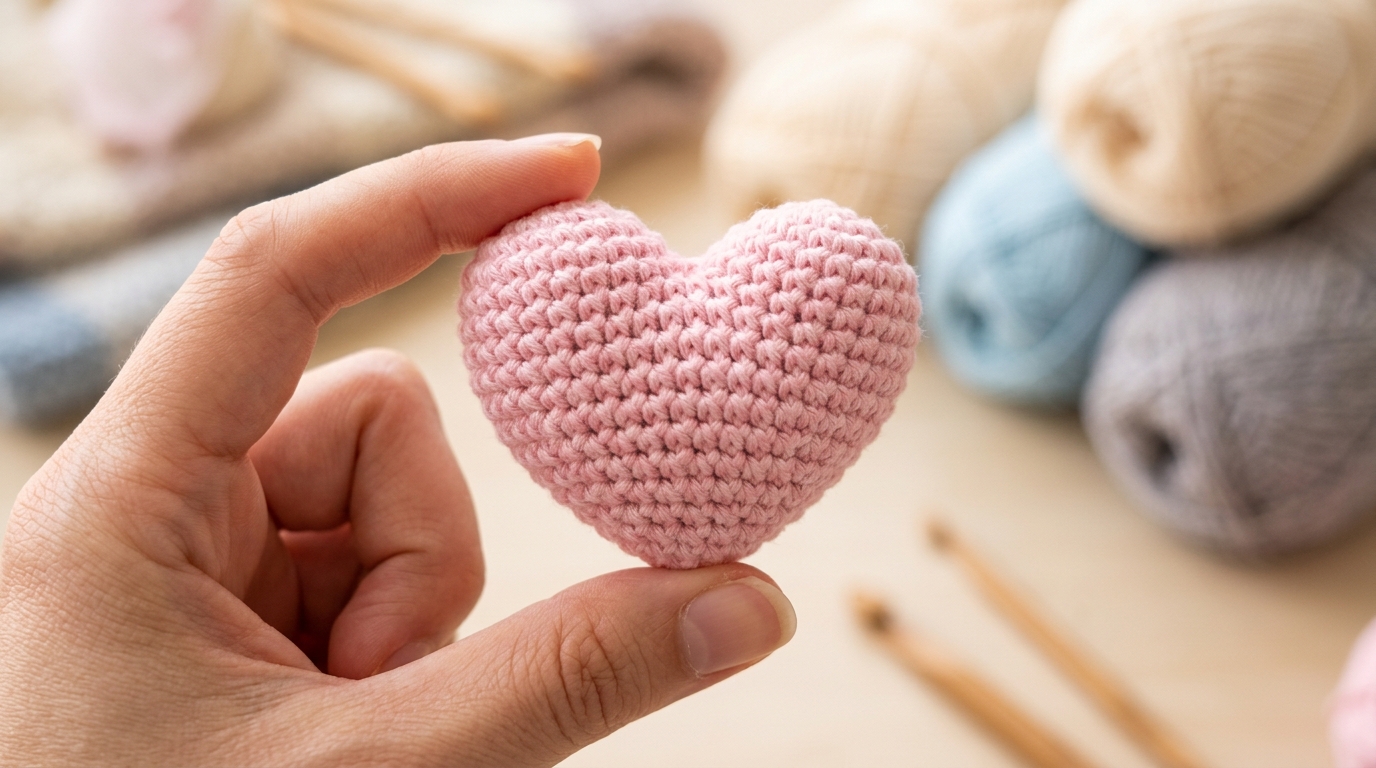
There is something undeniably magical about taking a single strand of yarn and turning it into a tangible, cheerful heart. Whether you are looking to create a sweet token of appreciation for a friend, crafting handmade embellishments for a baby blanket, or simply want to practice your shaping skills, the puffy crochet heart is a classic project that every stitcher should have in their repertoire. It is small, portable, and immensely satisfying to complete in just a few minutes, making it the perfect “go-to” pattern for when you have a bit of scrap yarn and a need for a little creative spark.
If you are a beginner, you might feel a bit intimidated by the idea of creating a 3D object. Please, take a deep breath and know that you are absolutely capable of this. The “puffy” effect is achieved through simple increases and height adjustments that mimic the natural curve of a heart. We will walk through this step-by-step, ensuring you feel confident from the first chain to the final weave of your yarn tail. For my intermediate friends, these hearts are a wonderful way to experiment with different yarn weights—from delicate lace weight for tiny pendants to chunky weight for cozy home decor accents. Let’s sit down, grab our hooks, and make something lovely together.
Quick Overview
This project is the quintessential quick win for any crochet enthusiast. It is designed to be accessible for beginners while offering plenty of room for creative customization by more experienced makers.
- Skill Level: Beginner-friendly.
- Estimated Time: 15–20 minutes per heart.
- Finished Size: Approximately 2.5 inches wide by 2.5 inches tall (when using worsted weight yarn).
- Best Use: Perfect for Valentine’s Day garlands, gift toppers, appliqué for hats, or simply as a “pocket hug” to keep in your purse for anxious moments.
- Why You’ll Love It: It requires very little yarn, works up incredibly fast, and teaches you the fundamentals of shaping in the round without needing complex amigurumi techniques like invisible decreases or magic rings—though we will use a simple, beginner-friendly construction method.
Materials or Tools Needed
Before we dive into the stitches, let’s make sure your project bag is ready. The beauty of this pattern is its flexibility.
- Yarn: Any scrap yarn you have on hand will work. Worsted weight (Size 4) acrylic, cotton, or wool is ideal for beginners because it is easy to see and handle.
- Crochet Hook: Choose a hook size that is slightly smaller than what is recommended on your yarn label. For worsted weight, a size G/6 (4.0mm) or H/8 (5.0mm) is usually perfect. Using a slightly smaller hook helps keep your stitches tight, which prevents the stuffing from poking through.
- Fiberfill or Stuffing: A very small amount of polyester fiberfill is needed to give the heart its 3D, puffy shape. If you don’t have stuffing, you can use scrap yarn bits.
- Tapestry Needle: Essential for weaving in your ends securely.
- Stitch Markers: Useful for keeping track of your rounds if you prefer to work in a continuous spiral.
- Scissors: Any sharp pair will do.
Crochet Terms, Stitches, or Key Concepts
We will use standard U.S. crochet terminology. Here is a quick refresher of the stitches we will be using:
- Chain (ch): The foundation for our work.
- Single Crochet (sc): The workhorse stitch that provides a dense fabric.
- Half Double Crochet (hdc): Provides a bit more height mid-way through the heart’s curves.
- Double Crochet (dc): Adds the height needed to create the top lobes of the heart.
- Slip Stitch (sl st): Used to transition between sections or to tie off your work.
- Increase (inc): Working two stitches into the same space to make the shape grow outward.
- Fasten Off: The act of cutting the yarn and pulling it through the final loop to secure the piece.
Helpful Notes Before You Start
Crocheting a puffy shape is all about tension. If your stitches are too loose, the stuffing inside will show through the gaps. If you notice your stitches are opening up, try dropping down a hook size. Don’t worry about getting it perfect on the very first try; these hearts are forgiving, and any “imperfect” heart just has more character.
When you are stuffing your heart, use small pieces of fiberfill. It is better to add a little bit at a time until you reach the desired “puff.” If you overstuff, the heart may start to look a bit bumpy or pull your stitches apart. We are aiming for a soft, pillowy appearance.
Main Tutorial: The Puffy 3D Heart
This pattern is worked in one continuous round, starting at the bottom tip and working upward to the two lobes.
The Foundation
Start with a slip knot on your hook. Chain 2.
Round 1: Work 6 single crochet (sc) into the second chain from your hook. (6 stitches)
Building the Shape
Round 2: Work 2 sc in each stitch around. (12 stitches)
Round 3: 1 sc in next st, 2 sc in next st repeat from to around. (18 stitches)
Round 4: 1 sc in next 2 sts, 2 sc in next st repeat from to around. (24 stitches)
Creating the Lobes
Now, we are going to divide the work to create the two rounded top lobes of the heart.
Round 5:
- Work 12 sc around. Stop. You are now at the halfway point.
- Skip the remaining 12 stitches and join with a slip stitch to the first stitch of this round to form the first loop.
- Continue working around these 12 stitches for 2 more rounds (Round 6 and 7).
- Lightly stuff this first lobe.
- Fasten off and pull the tail through.
Repeat this process for the second lobe using the remaining 12 stitches you skipped, attaching your yarn at the center point where you joined the first lobe.
Assembly and Closing
Once both lobes are stuffed and completed, you will notice a small gap between them at the center. Use your tapestry needle and the remaining yarn tail to sew that tiny gap closed. This helps the heart look seamless and cohesive.
Step-by-Step Explanation
Let’s visualize what you are seeing as you work. You start at the very point of the heart—the sharp tip. By increasing in every round, you are creating a flat, widening circle or triangle shape. Once you hit the widest point of the heart, splitting the stitches into two separate “tubes” or “lobes” allows the heart to curve inward at the top.
If you are a beginner, think of it as crocheting two tiny fingers on top of a circle. When you sew the gap closed, you are essentially pulling those two “fingers” together to form the deep dip at the top of the heart. It is the most rewarding part of the project because, suddenly, a flat piece of fabric turns into a 3D object that fits perfectly in the palm of your hand.
Common Mistakes to Avoid
- Leaving a large hole at the center: When starting your initial chain, pull your first stitch very tight. If there is a small hole at the tip of the heart, don’t worry! Use the starting yarn tail to sew the bottom tip closed from the inside or outside during finishing.
- Uneven stuffing: If one lobe looks bigger than the other, you may have stuffed it too firmly. Take a crochet hook or a pencil to gently redistribute the fiberfill until it looks balanced.
- Confusing the rounds: When working the lobes, it is easy to accidentally crochet into the wrong chain. Use a stitch marker to mark the center stitch where the two lobes meet so you don’t lose your place.
- Skipping the gauge check: Even if you aren’t making a garment, your yarn weight matters. If you use chunky yarn, your heart will be quite large; if you use thread, it will be tiny. Always match your hook and yarn appropriately, or be prepared to adjust your stitch counts.
Pro Tips for a Better Result
- Blocking: If you want your hearts to be perfectly uniform, you can lightly steam them (if using acrylic) or dampen them (if using cotton/wool) and gently press them into a rounded shape before the final drying.
- Color Transitions: Want a striped heart? Switch colors at the beginning of any new round by pulling the new color through the last two loops of the previous stitch.
- The “Invisible” Join: When finishing the second lobe, use an invisible join technique to hide the knot. This makes the surface of your heart look much more professional and smooth, which is a great skill to develop for other 3D projects like stuffed animals.
- Adding a Hanger: If you want to turn these into ornaments, cut a 6-inch strand of yarn, fold it in half, and use your hook to pull the loop through the top center of the heart. Tie the ends into a knot to create a beautiful, handmade loop for hanging.
Variations, Examples, or Personalization Ideas
The beauty of a heart is that it is a blank canvas.
- Texture: Try using a velvet yarn for your hearts; they are incredibly soft and feel luxurious to the touch. This makes them perfect for gifts or nursery decor.
- Embellishment: Sew a small bead or a sequin in the center of the heart for a bit of sparkle.
- Aromatherapy: If you are gifting these, add a drop of essential oil to a small piece of cotton ball before inserting it into the stuffing, or tuck a dried lavender sachet inside for a sweet-smelling gift.
- Size Variance: Try working the same pattern with a larger hook and double strands of yarn to make a “plushie” version, or use a tiny steel hook and crochet thread to make miniature hearts for jewelry.
Care, Storage, or Next Steps
To keep your crochet hearts looking fresh, avoid tossing them into a heavy-duty laundry cycle, as the fiberfill can shift or clump. If they get dusty, a gentle hand wash in cool water with a mild detergent is best. Lay them flat to dry, reshaping them with your fingers as needed.
If you have enjoyed this project, your next step could be branching out into basic amigurumi. Making a heart uses many of the same skills—working in the round, increasing, and stuffing—that are required for more complex projects like teddy bears or small dolls. Practice these skills, and you will find that you can eventually tackle almost any 3D crochet figure.
FAQ
How do I stop the stuffing from showing through my stitches?
The best way to prevent stuffing from showing is to use a smaller hook size. Aim for a hook that is one or two sizes smaller than recommended for your specific yarn weight. This forces the stitches to be tighter, essentially creating a “bunker” for the stuffing.
Can I make these hearts without stuffing?
Yes! If you are using these as an appliqué for a sweater or a blanket, you can leave them flat. Simply stop after you have created the full circle (Round 4) and create the lobes using slip stitches to shape the top, rather than continuing to crochet in rounds.
What is the easiest way to join the yarn for the second lobe?
Simply insert your hook into one of the stitches on the base, pull up a loop, and chain one. Treat that first chain as your starting stitch for the next round. Don’t worry if the tail is a bit loose; you can always weave it into the center of the heart when you finish.
Are these hearts suitable for beginners?
Absolutely. This is one of the most rewarding beginner projects because it introduces three-dimensional thinking. If you can make a circle, you can make a heart!
Can I use cotton yarn for these?
Cotton yarn is actually excellent for this project because it has very little stretch. This means your stitches will stay nice and tight, keeping the stuffing securely inside and ensuring your heart holds its shape for a long time.
Conclusion
I hope you have found this guide to creating puffy crochet hearts as enjoyable as I have. There is something truly special about slowing down and creating something small and sweet by hand. These hearts are more than just yarn and stitches; they are a small expression of love, a practice in patience, and a wonderful way to stretch your crochet skills.
Whether you are making a dozen for a classroom treat or just one for your own desk, remember that the value lies in the process as much as the result. Don’t be afraid if your first heart isn’t perfectly round or if your stuffing is a little uneven—every masterpiece started with a first, slightly imperfect draft. I encourage you to grab a cup of tea, put on your favorite podcast, and play with your yarn today. You might be surprised at how quickly you can fill a bowl with these little treasures. Happy crocheting!