
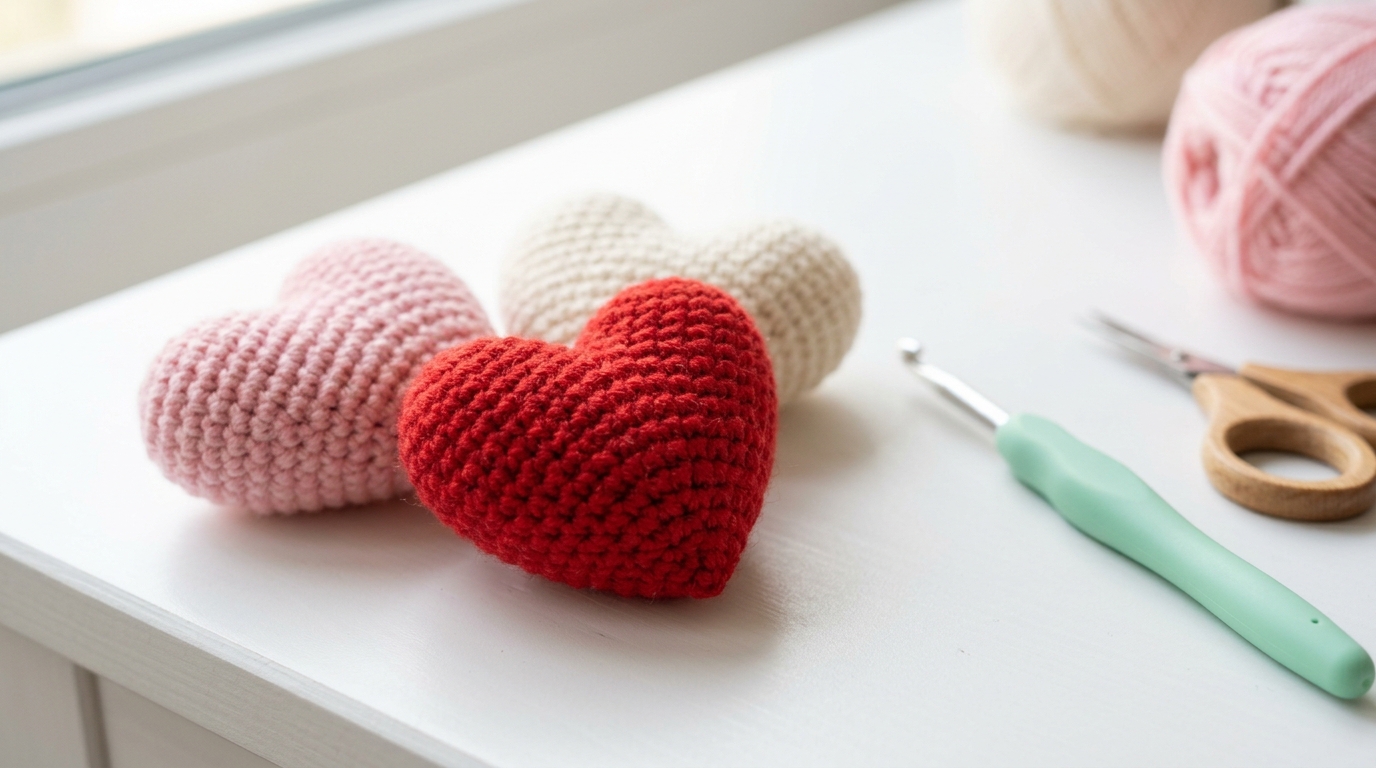
There is something uniquely magical about creating a tiny, dimensional heart from just a bit of yarn and a hook. Whether you are a brand-new crocheter looking for your first “real” project or an experienced maker in need of a quick, stress-relieving stash buster, the puffy 3D heart is a timeless classic. These little hearts are more than just cute shapes; they are the perfect way to practice working in the round, understanding increases and decreases, and mastering the art of the hidden seam.
I still remember the first heart I ever made. It felt like a little victory to watch that flat circle transform into a plump, soft shape simply by adding a bit of stuffing. Because these hearts are so versatile, you can turn them into garland pendants, charming zipper pulls for your project bags, or even gentle heirloom gifts for the people you love. In this guide, we are going to walk through the process of creating a beautiful, puffy 3D heart, keeping things simple, cozy, and perfectly measured for your hands. You don’t need fancy tools or years of experience—just a bit of patience and a willingness to create something lovely.
Quick Overview
- Skill Level: Beginner-Friendly Intermediate.
- Estimated Time: 20–30 minutes per heart.
- Finished Size: Approximately 2.5 inches wide by 2 inches tall (using medium weight yarn).
- Best Occasion: Valentine’s Day, bridal showers, “just because” gifts, or as a decorative touch for home crafts.
- Why You’ll Love It: It’s a fast, satisfying project that uses minimal yarn. It’s excellent for learning how to shape objects in three dimensions without worrying about complex garment patterns.
Materials and Tools Needed
To get started, you don’t need a specialized kit. You likely have most of these items in your craft corner already:
- Yarn: A small amount of worsted weight (Category 4) acrylic or cotton yarn. Solids work beautifully, but variegated yarns can add a fun, whimsical touch.
- Crochet Hook: A size G (4.0mm) or H (5.0mm) hook. A slightly smaller hook than recommended on the yarn label will help keep your stitches tight so the stuffing doesn’t peek through (this is called preventing “gaping”).
- Stuffing: A small handful of polyester fiberfill. If you don’t have this, you can even use small scraps of leftover yarn from previous projects.
- Tapestry Needle: For weaving in your ends and closing the final rounds.
- Stitch Marker: Essential for keeping track of your rounds since we will be working in a continuous spiral.
- Scissors: Any sharp pair will do.
Crochet Terms and Stitches
Before we dive into the pattern, let’s get comfortable with the terminology. We use standard U.S. crochet terms:
- Chain (ch): The foundation of your work.
- Single Crochet (sc): The workhorse of amigurumi. Insert hook, yarn over, pull up a loop, yarn over, pull through both loops.
- Stitch (st): The individual loop you crochet into.
- Increase (inc): Work two single crochet stitches into the same stitch. This is how we make our heart grow wider.
- Decrease (dec): Work two single crochet stitches together (sc2tog). This helps us shrink the shape to create the “curves” of the heart.
- Slip Stitch (sl st): Used to join rounds or finish off your work.
- Magic Ring (or Adjustable Loop): The classic way to start circles without a hole in the center.
Helpful Notes Before You Start
Crocheting for 3D shapes, or “amigurumi,” is slightly different than working flat rows. Here are a few tips to ensure your heart turns out soft and plump:
- Tight Tension: Try to keep your yarn tension consistent and tight. If your stitches are too loose, the poly-fill stuffing will show through the gaps. If you struggle with this, don’t be afraid to drop down a hook size.
- Continuous Rounds: We will be working in a continuous spiral. This means we won’t be slip stitching at the end of every round. Use your stitch marker to mark the first stitch of every round so you don’t lose your place.
- Stuff Firmly: Since this is a small project, you want to stuff it firmly enough that it holds its shape, but not so much that the stitches stretch and pull apart.
The 3D Puffy Heart Pattern
This heart is worked in two separate “humps” or lobes, which are then joined together in the center.
Making the First Lobe
- Round 1: Start with a magic ring. Work 6 sc into the ring. (6 sts)
- Round 2: 2 sc in each st around. (12 sts)
- Round 3: 1 sc in the next st, 2 sc in the next st—repeat from to around. (18 sts)
- Round 4: Sc in each st around. (18 sts)
- Round 5: Sc in each st around. (18 sts)
- Fasten off your first lobe, but do not cut your yarn on the second lobe!
Making the Second Lobe and Joining
Repeat Rounds 1 through 5 as above for the second lobe, but do not fasten off at the end. You should now have two separate pieces.
- Round 6 (The Join): Take your second lobe (still attached to the yarn). Insert your hook into the first lobe at the last stitch of Round 5 and join them together with a single crochet. You are now working across both pieces. Make 17 more single crochets around the first lobe, then continue to the second lobe and work 18 single crochets around it. You should have 36 stitches total for this round.
Shaping the Body
- Round 7: Sc in each st around. (36 sts)
- Round 8: 4 sc, dec—repeat 6 times. (30 sts)
- Round 9: 3 sc, dec—repeat 6 times. (24 sts)
- Round 10: 2 sc, dec—repeat 6 times. (18 sts)
- Round 11: 1 sc, dec—repeat 6 times. (12 sts)
- Note: This is the perfect time to add your stuffing! Use the back of your crochet hook to push the fiberfill into the top lobes of the heart.
- Round 12: Decreases all the way around (dec 6 times). (6 sts)
Finishing Your Heart
Once you have finished Round 12, cut your yarn, leaving a 6-inch tail. Thread this tail onto your tapestry needle. Weave the needle through the front loop of each of the final 6 stitches. Pull the yarn tight to close the hole perfectly—like a drawstring bag—and knot it securely. Push the needle through the center of the heart and out the other side to “hide” the tail, then trim it close to the fabric. The tail will disappear inside the heart.
Common Mistakes to Avoid
Even for experienced crocheters, small mistakes can affect the look of your project:
- The “Hole” in the Center: If your magic ring is loose, just pull the starting yarn tail firmly before joining your first round. You can also weave that tail through the center and pull it tight once more at the very end to seal any gaps.
- Losing the Count: Working in a spiral makes it very easy to lose track. If you do not have a stitch marker, a scrap of contrasting yarn works just as well. Simply lay the scrap over your needle as you start the first stitch of a new round.
- Twisting the Join: When joining the two lobes, ensure your working yarn is pulled taut so you don’t end up with a large, unsightly gap in the cleavage of the heart.
Pro Tips for a Better Result
Want your hearts to look like they came from a boutique? Try these professional touches:
- Blocking: If your heart looks a little “lumpy” after stuffing, gently pinch it and steam it. Simply hold it a few inches from a steam iron (without touching the yarn) and let the steam relax the fibers. Gently mold it into the perfect shape with your fingers while it cools.
- Color Transitions: If you want a fun aesthetic, try using a self-striping or ombre yarn. Even if you don’t change colors manually, the yarn will do the work for you, creating a beautiful gradient effect.
- Personalization: If you are gifting these, attach a small ribbon loop to the top before closing the hole. This turns the heart into an instant ornament!
Care and Next Steps
Because these hearts are usually made with acrylic or cotton yarn, they are quite durable. If they get a little dusty, you can spot-clean them with a damp cloth and mild soap. Avoid putting them through the washing machine, as the stuffing can shift and lose its shape.
Now that you’ve mastered the 3D heart, what’s next? You could try making several in different sizes by using thinner or thicker yarn. Or, consider embroidering a small initial on the front of a heart for a thoughtful, personalized gift. The skills you practiced here—increasing, decreasing, and sewing pieces together—are exactly the same skills you will use when you decide to try making larger stuffed animals or amigurumi projects.
FAQ
Why are my stitches looking uneven?
This is often due to fluctuating tension. Especially when moving from the lobes to the main body, try to keep your pull-through distance consistent for every stitch. Practice makes perfect, and your hands will naturally find a rhythm the more hearts you make.
Can I use bulky yarn for this pattern?
Absolutely! Using bulky or super-bulky yarn will result in a much larger, “plushie” style heart. You may want to increase your hook size to accommodate the thicker strand, but otherwise, the pattern remains exactly the same.
How do I stop the stuffing from coming out?
If you see inner stuffing between your stitches, your hook is likely too large for your yarn. Try dropping down one size. A tighter, more compact fabric is the key to a professional-looking amigurumi heart.
Can I make a flat heart instead?
This pattern is designed specifically for a 3D effect. If you want a flat heart, you would typically work in rows using double crochet stitches, which is a completely different technique. Stick to this pattern if you want that lovely, huggable, puffy texture.
Does the stitch count have to be exact?
For the most part, yes. The math is designed to create a sphere-like shape. If you lose track by one or two stitches, don’t panic! The beauty of handmade items is that a small variation adds character. Just ensure your decreases are spaced relatively evenly to keep the shape balanced.
Conclusion
Creating a puffy 3D heart is a gentle and rewarding way to spend an afternoon. Whether you are using up your yarn scraps or preparing a thoughtful gift for a friend, the process of turning a simple string into a tactile object is truly special. Crochet is a journey of small stitches building into something beautiful, and I hope this project brings a little bit of joy and warmth to your home today. Remember to be kind to yourself as you learn—every mistake is just a part of the creative process. Happy hooking!