
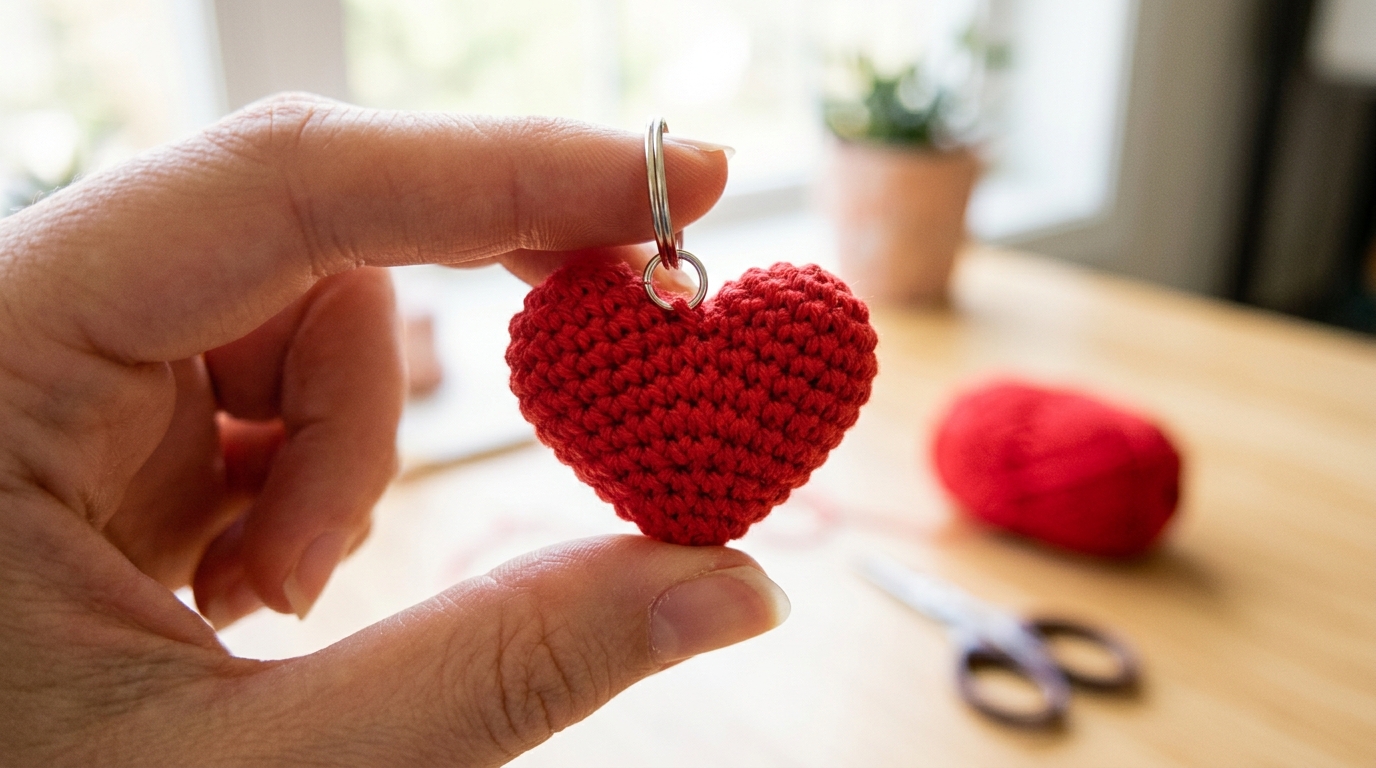
A Warm Welcome to Your New Favorite Quick Crochet Project
There is something truly magical about taking a simple length of yarn and, in just a few minutes, transforming it into a tangible symbol of affection. Whether you are a brand-new crocheter just picking up your first hook or a seasoned artisan looking for a quick and satisfying palette cleanser, the tiny crochet heart is the perfect project. These sweet tokens are more than just yarn; they are little messages of love, perfect for tucking into a lunchbox, attaching to a gift tag, or scattering on a table at a celebration.
One of the most beautiful aspects of crochet is its accessibility. You don’t need an entire afternoon or a complex stitch dictionary to create something meaningful. In this tutorial, I am going to walk you through a pattern for a perfect, classic heart that takes roughly five minutes to finish. It is small, portable, and incredibly beginner-friendly. My goal is to help you feel confident as you create these love tokens, ensuring your stitches are even, your edges are crisp, and your finished hearts are ready to be shared with the people who make your world a little brighter. Let’s sit down, grab our hooks, and make something lovely together.
Quick Overview
This project is designed to be the ultimate quick win. Because it is small and requires only basic knowledge of foundational crochet stitches, it is perfect for those moments when you need a creative boost without a huge time investment.
- Skill Level: Absolute Beginner.
- Estimated Time: 5 minutes per heart.
- Finished Size: Approximately 2 inches wide by 2 inches tall (depending on yarn weight).
- Best Use: Gift tags, greeting card embellishments, yarn-bombing, or sweet pocket tokens.
- Why You’ll Love It: It uses only a tiny amount of scrap yarn, it’s a meditative process that helps you practice your tension, and the result is undeniably charming.
Materials and Tools Needed
One of the best things about making these little hearts is that you likely already have everything you need in your crochet bag. You don’t need to go out and buy expensive supplies.
- Yarn: Any weight will work, but for a standard-sized heart, I recommend a medium weight (worsted weight) cotton or acrylic blend. Cotton holds its shape beautifully for small projects.
- Crochet Hook: Choose a hook that is slightly smaller than what is recommended on your yarn label. This creates a tighter stitch density, which keeps the heart looking sturdy rather than floppy. For worsted weight yarn, a size H (5.0 mm) or G (4.0 mm) hook is usually perfect.
- Scissors: Any sharp pair will do.
- Yarn Needle: A blunt-tipped tapestry needle is necessary for weaving in your tail ends.
- Optional: A stitch marker if you find it hard to identify your starting stitch, though for this pattern, you likely won’t need one.
Crochet Terms and Stitches
We will be using standard American crochet terminology. If you are new, here is a quick guide to the terms we will use:
- Slip Knot: The starting loop on your hook.
- Chain (ch): The basic foundation stitch. You yarn over and pull through the loop on your hook.
- Slip Stitch (sl st): Insert the hook, yarn over, and pull through both the stitch and the loop on your hook. We use this to move across the work or join pieces.
- Single Crochet (sc): Insert hook, yarn over, pull up a loop, yarn over, and pull through both loops on the hook.
- Half Double Crochet (hdc): Yarn over, insert hook, pull up a loop (3 loops on hook), yarn over, and pull through all 3 loops.
- Double Crochet (dc): Yarn over, insert hook, pull up a loop (3 loops on hook), yarn over, pull through 2, yarn over, pull through remaining 2.
- Treble Crochet (tr): Yarn over twice, insert hook, pull up a loop, [yarn over and pull through 2 loops] 3 times.
Helpful Notes Before You Start
Before you begin, remember that crochet is a craft of rhythm and patience. If your first heart doesn’t look exactly like your second, that is completely normal! That is just the beauty of handmade items.
- Tension Matters: Because this project is small, try to keep your yarn tension consistent. If your stitches are too loose, the heart structure might look a bit gapped. A slightly tighter tension, especially around the treble crochet stitches, will give your heart a crisp, heart-shaped silhouette.
- The Magic of the Magic Ring: While some patterns use a chain-four loop to start, I prefer using a “magic ring” (or adjustable ring) for this project. It allows you to pull the center of the heart tight so there isn’t a hole in the middle. If the magic ring feels intimidating, don’t worry—a simple chain-3 joined with a slip stitch works just fine too.
The Perfect Love Token Pattern
This pattern is worked in one continuous piece in the center of a ring. Follow these steps carefully, and you will have a beautiful result in no time.
The Foundation
Start by making a magic ring. If you are a beginner and haven’t mastered the magic ring, simply chain 3 and join with a slip stitch to the first chain to form a ring.
The Working Round
Work the following stitches into the center of your ring:
- Chain 2 (this acts as the beginning of our height).
- Work 3 Treble Crochet (tr) stitches into the ring.
- Work 3 Double Crochet (dc) stitches into the ring.
- Chain 1, work 1 Treble Crochet (tr) into the ring (this is the point at the bottom of the heart).
- Chain 1, work 3 Double Crochet (dc) into the ring.
- Work 3 Treble Crochet (tr) into the ring.
- Chain 2 and then slip stitch (sl st) into the center of the ring.
Finishing the Shape
Pull the tail of your yarn gently to close the magic ring tightly. Use your fingers to shape the points of the heart. Cut your yarn, leaving a tail of about 5-6 inches. Pull the tail through the final loop on your hook to fasten off. Use your yarn needle to weave the starting tail into the center of the heart where it won’t be seen. You can either knot the two remaining tails together to create a hanger or simply weave them both into the back of the work for a clean finish.
Step-by-Step Breakdown for Beginners
If you felt that went by a little quickly, let’s look at the “why” behind the stitches.
When you chain 2 and start with treble crochets, you are building the “hump” of the left side of the heart. Treble crochets are tall stitches, which gives the heart that nice, rounded top. The double crochets are shorter, which helps the heart begin to curve downward. That single chain and one treble crochet in the middle acts as the anchor point, or the bottom tip of the heart. By following this with another set of double crochets and treble crochets, you are essentially creating a mirror image on the other side. The final chain 2 and slip stitch bring the yarn back to the center, creating the dip between the two humps.
Common Mistakes to Avoid
Even in a five-minute project, it helps to be aware of common pitfalls so you can create a professional-looking result every time.
- Leaving the Center Hole Too Large: This is the most common issue. If you use a chain-based start, your hole will naturally be a bit larger. If you use a magic ring, ensure you give that tail a firm tug to close the center completely before you weave in your ends.
- Uneven Stitch Heights: If one side of your heart looks lower than the other, check your tension. Often, we crochet more tightly on one side because the project is rotating in our hands. Try to relax your grip mid-way through.
- Skipping the Finishing Touches: Weaving in your ends is boring, I know! But if you don’t secure them, your beautiful token might unravel. Always double-knot the thread on the back side of the heart before trimming the excess yarn.
- Using Too Much Yarn: Since this uses only a few yards, it is easy to accidentally start with a massive piece of yarn from the skein. Keep your yarn attached to the ball or pull a small manageable length so you don’t get tangled.
Pro Tips for a Polished Result
If you want to take your love tokens to the next level, here are a few ways to add that “handmade with love” professional touch:
- Blocking Your Work: Even small projects benefit from a light mist of water. After you finish, pin your hearts down on a clean towel in the shape of a heart and lightly spray them with water. Let them dry completely. This sets the stitches and ensures they keep their shape perfectly.
- Starch for Durability: If you plan on using these as gift tags or ornaments, a light spray of fabric stiffener or starch will make them rigid and keep them from curling over time.
- Mixing Textures: Try making these with different yarn weights! A heart made from fine crochet thread looks delicate and vintage, while a heart made from chunky wool looks cozy and modern.
- Adding Embellishments: Once you have the pattern down, try sewing a small bead or a tiny button in the center. It adds a lovely piece of jewelry-like detail.
Variations and Personalization
Once you have mastered the basic heart, the possibilities are endless. You can use these for so many creative DIY projects.
- Garland Magic: Make twenty of these in different shades of red, pink, and white, and string them onto a length of twine. It makes for the most darling Valentine’s Day mantle decor.
- The “Heart-felt” Greeting Card: Use a dab of fabric glue to attach one of these hearts to the front of a blank card. It turns a store-bought card into a handmade keepsake.
- Accessorize: Sew a pin back onto the reverse side of the heart, and you have an instant brooch for your favorite cardigan.
- Seasonal Colors: Don’t limit yourself to red and pink! Use soft blues and yellows for a baby shower, warm greens and oranges for autumn, or bright primary colors for a child’s birthday party.
Care and Storage
Because these are small, they are quite hardy. If a heart gets a little misshapen in your bag or a gift box, just give it a quick steam with your iron (holding it a few inches away) and gently reshape it with your fingers. If you have a collection of these tokens, store them flat in a small breathable pouch or an envelope. Avoid long-term storage in direct sunlight to keep the colors vibrant season after season.
FAQ
Can I use this pattern if I have never crocheted before?
Yes! This is an excellent beginner project. If you are totally new, I recommend watching a quick video on how to make a magic ring or how to stitch into a starting loop. Once you master the movements of the basic stitches, you will be able to make these in your sleep!
How do I stop the heart from looking “jagged”?
That usually means your tension is a bit erratic. Try to keep the same amount of “pull” on your yarn for every stitch. If you find your treble crochets are loose, give the working yarn an extra little tug before you pull through the final loops.
Can I make the heart larger?
Standard scaling for this specific pattern is tricky. If you want a larger heart, you would need to add an extra round of single crochet stitches around the exterior. You would follow the pattern as written, and then in the second round, crochet two stitches into every space to maintain the heart shape.
Is there a specific type of yarn that works best?
Mercerized cotton is the gold standard for small projects like this because it doesn’t stretch or fuzz, which keeps the stitch definition crisp. However, any acrylic or wool blend you have in your scrap bin will be perfectly fine.
What should I do if my tail end won’t stay tucked in?
After weaving the tail through your final stitches, trim it close to the work. If you are very worried about it popping out, add the tiniest dot of clear-drying fabric glue (not hot glue) to the very end of the thread before you snip it.
Conclusion
Creating something with your own two hands is a powerful act of self-care and a beautiful way to share kindness with others. These little crochet hearts are more than just a technique; they are a reminder that even the simplest efforts can yield something truly beautiful. Whether you are using this as a meditative exercise to calm your mind or as a way to create thoughtful, handmade gifts for your loved ones, I hope this project brings a little extra joy to your day.
Remember, every expert was once a beginner who refused to put down the hook. Keep practicing, keep experimenting with colors, and most importantly, enjoy the process. Your stitches are unique to you, and that is exactly what makes your handmade work so special. Happy crocheting!