
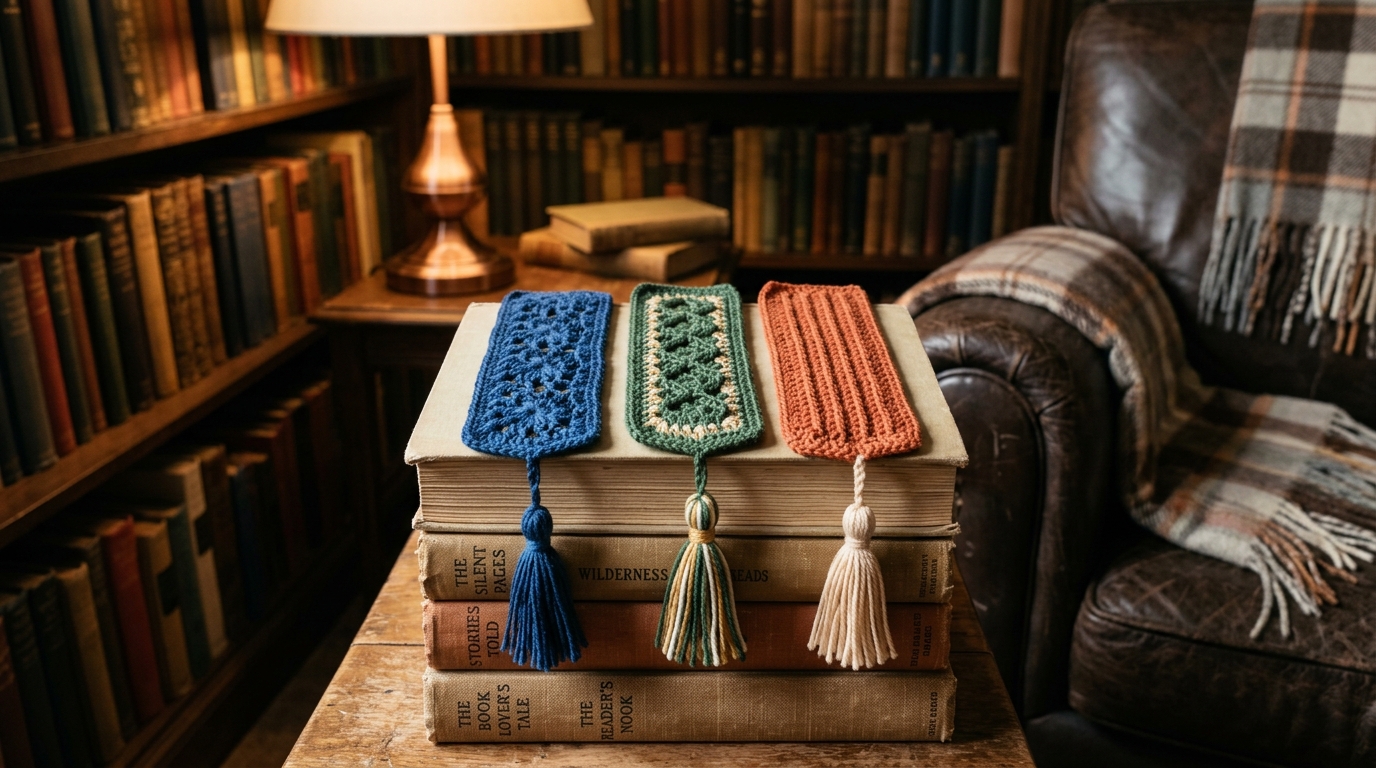
There is something truly magical about the bond between a good book and a handmade bookmark. Whether you are curling up with a worn paperback on a rainy afternoon or diving into a sleek hardcover at the park, having a tangible piece of craftsmanship to mark your place elevates the entire reading experience. For those of us who cherish the tactile joy of fiber arts, crochet bookmarks offer the perfect “instant gratification” project. They are quick, satisfy the creative itch, and make thoughtful, personalized gifts for the readers in your life.
If you have never picked up a hook before, or if you are looking for a relaxing, low-stress project between larger afghans and sweaters, this tutorial is designed for you. We will go through the process of creating a beautiful, elegant bookmark from start to finish. You will find that even with just a few basic stitches, you can create something functional, durable, and undeniably charming. Let’s prepare to capture your love for literature in every stitch.
Quick Overview
This project is perfectly suited for beginners who want to master essential stitches while creating a gift-ready item.
- Skill Level: Beginner-friendly.
- Estimated Time: 30 to 45 minutes per bookmark.
- Finished Size: Approximately 2 inches wide by 8 inches long (customizable).
- Best Use: Personalized gifts, book clubs, teacher appreciation tokens, or a special treat for your own home library.
- Why You’ll Love It: It is a stash-buster project that uses only a minimal amount of yarn and requires very few tools, making it the ideal “grab and go” crochet project.
Materials and Tools Needed
To create your bookmark, you do not need an extensive array of supplies. In fact, you likely have most of these in your craft basket already.
- Yarn: A small amount of weight 2 (fine) or weight 3 (light) cotton yarn is ideal. Cotton is preferred because it holds its shape well and lacks the “fuzz” of wool, which keeps the bookmark from snagging on delicate book pages.
- Crochet Hook: A size C (2.75mm) or D (3.25mm) hook works beautifully for this weight of yarn. If you use a slightly thicker yarn, adjust your hook size so the stitches remain tight enough to look polished but flexible enough to lay flat.
- Scissors: Any pair of sharp craft scissors will do.
- Tapestry Needle: Essential for weaving in your ends securely.
- Optional: A small tassel maker or a piece of cardboard to wrap fringe.
Crochet Terms and Concepts
Before we begin, let’s get comfortable with the terminology. We use standard U.S. crochet terms to ensure your bookmark turns out perfectly.
- Chain (ch): The foundation of most crochet projects. Yarn over and pull through the loop on your hook.
- Single Crochet (sc): Insert hook into the next stitch, yarn over, pull up a loop, yarn over, and pull through both loops on the hook. This creates a dense, sturdy fabric.
- Double Crochet (dc): Yarn over, insert your hook into the stitch, pull up a loop, yarn over, pull through two loops, yarn over, and pull through the final two loops. This is taller and airier than the single crochet.
- Slip Stitch (sl st): Insert your hook, yarn over, and pull through both the stitch and the loop on your hook. This is mostly used for finishing or joining rounds.
- Fasten Off: After cutting your yarn, pull the tail through the final loop on your hook to lock the stitch in place.
Helpful Notes Before You Start
Crocheting a small item like a bookmark is all about tension. Because the bookmark will spend its life pressed between stiff book pages, you want your stitches to be consistent and firm. If your stitches are too loose, the bookmark might stretch out or catch easily; if they are too tight, it will feel stiff like a piece of cardboard. Practice your tension on a small swatch before starting the main piece to ensure you are happy with the drape.
Additionally, remember that cotton yarn does not have the “give” of wool. If you are struggling with hand fatigue, take a break every few rows. This project is meant to be a joyful, meditative experience, not a race.
The Elegant Bookmark Pattern
This pattern creates a classic, lacy finish that looks delicate but is actually quite sturdy.
Part 1: The Foundation
Start with a slip knot on your hook. Ch 11.
Part 2: The Main Body
Row 1: Dc in the 4th chain from the hook and in every chain across. (You will have 9 dc stitches, including the turning chain, which counts as a stitch). Turn your work.
Row 2: Ch 3 (counts as the first dc). Skip the first stitch, then dc in the next 7 stitches, ending with 1 dc in the top of the turning chain. (Total: 9 stitches). Turn.
Repeat Row 2 until the bookmark reaches your desired length—usually about 7 to 8 inches for a standard trade paperback.
Part 3: The Finishing Touches
Once you reach your desired length, do not fasten off just yet. We are going to add a simple picot edge for that “elegant” look.
Row (Border): Ch 1, turn. Sc in every stitch across the top. When you reach the corner, ch 3, slip stitch into the base of the chain just made (this creates a little point). Continue working this border down the sides and across the bottom of the bookmark. This step adds structure and a professional, store-bought finish to your handmade gift.
Fasten off and secure your yarn tails using a tapestry needle, weaving them into the back side of the work so they are completely hidden.
Step-by-Step Explanation
When you first start your foundation chain, make sure you don’t keep them too tight—this is the most common point of frustration for beginners. If the base of your bookmark starts to curve, check your chain tension. As you move into your double crochet rows, count your stitches periodically. Because there are only 9 stitches per row, it is very easy to accidentally drop one at the very end or at the turning chain, which will result in a bookmark that gets narrower and effectively “triangles” toward the end. If you see your edges pulling inward, you have missed a stitch!
Common Mistakes to Avoid
Many beginners find that their first few projects have “wobbly” edges. This usually happens because the turning chain is being counted (or not counted) correctly. In this pattern, we treat the starting chain as a stitch. Be careful to crochet into the top of that turning chain at the end of every row; if you skip it, your rows will decrease by one stitch every time, and your bookmark will not have straight, clean sides.
Also, be wary of “yarn barfing”—when you pull too much yarn from a skein at once, leading to tangles. Use a center-pull ball if possible, or wind your yarn into a small ball beforehand to make the process smoother.
Pro Tips for a Better Result
For a truly polished look, block your finished bookmark. Because it is a long, narrow strip, it may naturally want to curl just slightly. To block, lightly dampen the finished piece with water (or a spray bottle), lay it flat on a towel, and pin it into a perfectly straight rectangle. Let it dry completely. This simple act transforms a simple handmade item into a high-quality gift that looks like it came from a specialty boutique.
If you are giving this as a gift, consider attaching a small book-themed charm to the bottom fringe. It adds a sophisticated layer that makes the gift feel thoughtful and intentional.
Variations and Personalization
The beauty of this project is its versatility. Once you master the base pattern, you can experiment with:
- Color Blocking: Use two different colors of yarn—one for the first half and one for the second.
- Texture: Try using a variegated yarn to add visual interest without changing colors mid-row.
- The Crown: Instead of a flat end, you can gather the stitches at the very end to create a small “flower” or “star” for a more whimsical, feminine aesthetic.
- Width: If you want a wider bookmark for large hardcovers, simply increase your starting chain (ensure you use an odd number if you choose to include lace patterns later).
Care and Next Steps
Cotton yarn is wonderfully durable. If your bookmark eventually collects dust or gets a little worn, you can easily hand wash it in cool water with a tiny drop of mild detergent. Lay it flat to dry, and it will be as good as new.
Now that you have mastered the art of the bookmark, you are ready for your next fiber arts adventure. If you enjoyed the rhythm of these double crochet stitches, consider trying a simple washcloth or a small coaster next. These projects use the same fundamental skills but allow you to expand into larger, more complex shapes.
FAQ
How do I stop my bookmark from getting too thin at the ends?
This usually happens because you are missing the final stitch of each row. Always count your stitches as you work. If your pattern requires 9 stitches, ensure you have 9 stitches at the end of every single row before you turn.
What is the best yarn for a beginner?
For a bookmark, stick to 100% cotton in a solid light color. The solid color makes it much easier to see individual stitches, and cotton is much easier to manage than slippery acrylic or fuzzy mohair.
Can I make this with thicker yarn?
Yes, but remember that a bulky yarn will make a very thick bookmark that may cause your book spine to bulge or even damage the binding. Stick to fine or light weight yarns for the most professional, book-friendly result.
How do I attach a tassel to the bottom?
To add a tassel, wrap your yarn around three fingers about 15–20 times. Slide it off, cut a separate piece of yarn to tie one end tightly, and cut the other folded end with your scissors. Use a tapestry needle to pull the top knot of the tassel through the bottom center of your work.
Do I really need to wash my finished bookmark?
You don’t have to, but blocking it properly makes a world of difference. It sets the stitches and ensures your bookmark lays perfectly flat, which is essential for a gift. It turns a “homemade” project into a “handmade” heirloom.
Conclusion
Crocheting for the readers in your life is a beautiful way to combine two wonderful worlds: the quiet, imaginative space of a book and the calming, repetitive motions of the crochet hook. Whether you are crafting for your own collection or making a special gift for a dear friend, this bookmark project is a gentle reminder that even the simplest stitches can create something elegant and truly useful. Take your time, enjoy every loop, and don’t be afraid to experiment with your favorite colors. You have everything you need to start creating—happy crocheting!