
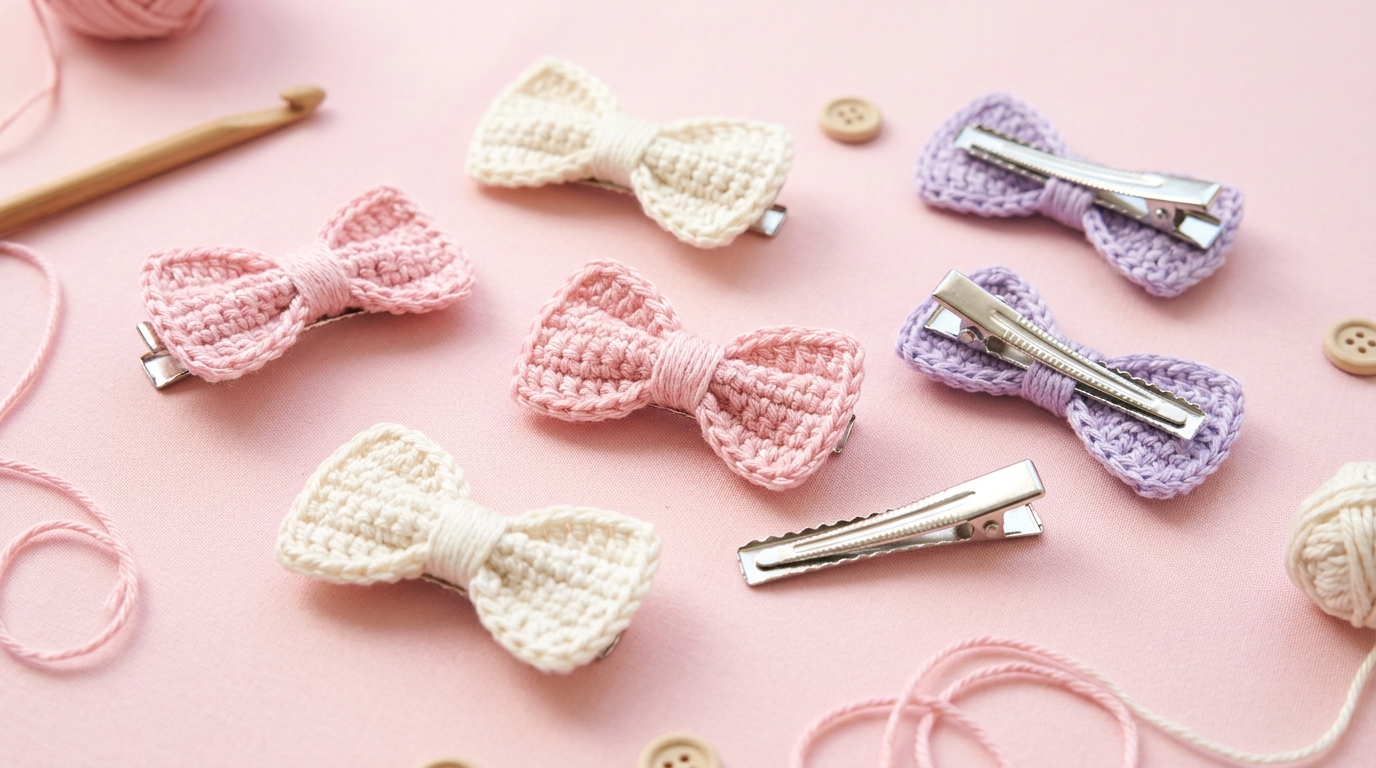
There is something undeniably special about the magic of the crochet hook and a little bit of yarn. Whether you are a brand-new beginner looking for your very first “instant gratification” project or an experienced maker in need of a quick, thoughtful gift, making a crochet bow is a transformative experience. These dainty little accessories are the “little black dress” of the crafting world—they are incredibly versatile, infinitely customizable, and take very little time to whip up.
Crochet bows are the perfect starting point for learning how to control your tension and understand basic stitch anatomy. Beyond the basics, they serve as the perfect embellishment for everything from baby headbands and hair clips to decorative gift toppers or even accents on a cozy handmade sweater. They feel like a warm hug for your projects, adding that extra touch of femininity and charm that handmade items are famous for. My goal here is to guide you through this process with warmth and ease, ensuring that by the time you reach the end of this article, you will have a handful of adorable bows ready to brighten your day.
Quick Overview
This project is designed to be a relaxing, low-stakes creation. Here is what you can expect as you dive in:
- Skill Level: Absolute Beginner.
- Estimated Time: 15 to 20 minutes per bow.
- Finished Size: Customizable, but the standard pattern creates a bow approximately 3 inches wide.
- Best Use: Hair clips, scrap-buster project, handmade gifts, or as a decorative flourish for home decor.
- Why You’ll Love It: It uses only a tiny amount of yarn, making it the ultimate stash-buster, and it is a wonderful way to experiment with color or texture without committing to a large, time-consuming project.
Materials and Tools Needed
One of the best parts of this project is that you likely already have everything you need tucked away in your craft corner.
- Yarn: Any weight will work! I personally love using a soft cotton yarn for a crisp, defined look, but worsted weight acrylic is perfect for beginners because it is easy to handle.
- Crochet Hook: Choose a hook that is slightly smaller than what is recommended on your yarn label. This creates a tighter, more polished fabric that keeps the bow from looking “gappy.” For worsted weight yarn, an H (5.0mm) or G (4.0mm) hook is usually perfect.
- Scissors: Any sharp pair will do.
- Tapestry Needle: Essential for weaving in ends neatly.
- Optional Adornments: Alligator hair clips, a dab of fabric glue or hot glue, or a piece of ribbon for the center if you choose not to crochet the center piece.
Crochet Terms and Stitches
Before we start, let’s get comfortable with the vocabulary. We will be using standard U.S. crochet terms throughout this tutorial:
- Chain (ch): The foundation of your work.
- Single Crochet (sc): A short, sturdy stitch that is perfect for creating dense fabric.
- Half Double Crochet (hdc): A slightly taller stitch that adds a bit of height without being as airy as a double crochet.
- Slip Stitch (sl st): Used to join rounds or to move across your work without adding height.
- Fasten Off: Cutting your yarn and pulling the tail through the final loop to secure it.
- Weave in Ends: Using a tapestry needle to hide your yarn tails inside the finished work so they don’t come undone.
Helpful Notes Before You Start
Crocheting a bow is all about the “cinch.” Because this project is quite small, tension is key. You don’t want your stitches to be so tight that you can’t insert your hook, but you want them snug enough that the bow holds its shape once you tie the center. Don’t feel pressured to have perfect tension right away; part of the beauty of a handmade item is the unique character your hands bring to the stitches. If you find your bow is curling too much, try going up a half-size in your hook, or if it feels too floppy, try going down. Experimentation is the greatest teacher!
The Classic Crochet Bow Pattern
This pattern is worked in one continuous rectangle, which keeps things simple and keeps your yarn tails to a minimum.
Part 1: The Base Rectangle
Row 1: Chain 10. (You can increase or decrease this number to make the bow wider or narrower).
Row 2: Work 1 single crochet in the second chain from the hook and in each chain across. Turn. (9 stitches).
Row 3-10: Chain 1 (this does not count as a stitch), work 1 single crochet in each stitch across. Turn.
Continue repeating Row 3 until your rectangle looks like a little square or a slightly elongated rectangle, depending on your preference for a “chunky” or “sleek” bow. Once you reach your desired height, fasten off, leaving a long 8-inch yarn tail—this will be your secret weapon for assembling the bow.
Part 2: The Center Band
You can skip this if you prefer to wrap the center with a piece of lace or ribbon.
Row 1: Chain 4.
Row 2: Work 1 single crochet in the second chain from the hook and each chain across. Turn. (3 stitches).
Row 3-6: Chain 1, work 1 single crochet in each stitch across. Turn.
Fasten off, leaving a 6-inch yarn tail.
Part 3: Assembly
Take your larger rectangle and pinch the center firmly to create that classic “bow” look—it should naturally want to accordion. Take the long yarn tail you left on the large rectangle and wrap it tightly around the center several times. Don’t be afraid to pull firmly here; the tighter the wrap, the better the final shape!
Take your small center band and wrap it around the cinched middle. Use your tapestry needle to sew the two ends of the small band together at the back of the bow. Use the remaining yarn tails to secure the bow to a hair clip, or tie it onto a gift box.
Step-by-Step Explanation for Success
If the pattern felt a little technical, let’s walk through the “vision” of the piece. When you finish the rectangle, it will look like a simple, plain strip of fabric. Don’t panic! It is supposed to look that way. The magic happens during the “cinch” phase.
As you wrap the yarn tails around the center, you are essentially “training” the fabric to hold its shape. The center band then acts as a corset, giving it that finished, professional look. If you are attaching a clip, I highly recommend securing it with a bit of thread or sewing it directly into the center wrap to ensure it stays put through a whole day of wear.
Common Mistakes to Avoid
Even expert crocheters run into little hiccups. Here is how to keep your bow project stress-free:
- The “Twisted” Foundation: When you start your chain, make sure your stitches are all facing the same way before you work into them. A twisted start is hard to fix later!
- Loose Tension on the Wrap: If you don’t wrap the center tightly, the bow will slump and lose its shape. Treat the center wrap like you’re tying a corset; it needs to be firm.
- Using Too Much Yarn: Since bows are small, it is easy to leave unnecessarily long tails. Keep your tails reasonable to avoid waste, but remember you need enough length to sew the pieces together.
- Ignoring the Back: We often focus so much on the front of the bow that we forget the back. Make sure your final knot or weave-in is secure. No one likes a bow that falls apart after one use!
Pro Tips for a Better Result
- Blocking: If your yarn is a bit unruly, give your flat rectangle a light steam iron (if using acrylic, hold the iron above the piece without touching it) or pin it flat after a light wash. It makes the stitches look uniform and professional.
- Mixing Yarns: Try making the center band in a contrasting color or a metallic yarn for a festive look.
- Stiffening: If you are using a soft cotton and you want your bow to be rigid, you can lightly dab a mixture of water and a tiny bit of white craft glue over the back of the bow and let it dry. This is perfect for bows that will be used for hair accessories.
- Layering: Try making two rectangles—one slightly larger than the other—and stacking them before wrapping. It creates a beautiful, dimensional double-layered bow.
Variations and Personalization
The beauty of this project is that it is a blank canvas.
- For the Holidays: Use deep red or forest green velvet yarn for a Christmas bow that looks expensive and chic.
- For Baby Showers: Use super-soft pastels or white cotton. These make incredible, thoughtful gifts that look like they came from a high-end boutique.
- For Everyday Chic: Use a linen-blend yarn in earthy tones for a sophisticated hair accessory that works as well in the office as it does at brunch.
- Texture Play: Try holding two different colors of thinner yarn together as one for a marbled, custom look.
Care and Next Steps
To keep your handmade bows looking fresh, keep them away from direct heat or harsh chemicals. If they get a little crumpled in your bag, a quick puff of steam or even just gently reshaping them with your fingers will bring them right back to life.
Once you have mastered the simple bow, the world of crochet accessories opens up. You might try incorporating a picot stitch edge to your rectangle for a lacy, Victorian-inspired bow, or perhaps even trying a bow with extended loops for a more dramatic, oversized style. The skills you practiced here—consistent stitching, finishing techniques, and assembly—are the building blocks for every single project you will tackle in the future.
FAQ
How do I attach the bow to a hair clip?
Simple! Slide the fabric of your bow over the top portion of a metal alligator clip. Use the yarn tail from your center wrap to sew the back of the bow firmly to the clip, ensuring it doesn’t slide around.
Can I use scrap yarn?
Absolutely! This is the best project for scrap yarn. Since a bow uses only a few yards, it is a wonderful way to use up those “leftover” balls of yarn that aren’t quite big enough for a sweater but are far too beautiful to throw away.
Why does my bow look flat?
If your bow looks a little too flat, ensure you are using a hook that matches your yarn weight. If the stitch is too large, it won’t have the structure to “poof” out. You can also sew a small piece of stiff felt or interfacing between the layers if you want it to stand up perfectly.
Can I wash these bows?
It depends on the yarn! If you used a machine-washable cotton or acrylic, you can put the bow in a mesh laundry bag and toss it in the wash on a gentle cycle. However, spot-cleaning is almost always enough for hair accessories.
How do I make the bow hold its shape better?
Blocking is your best friend. Alternatively, if your yarn is a natural fiber like cotton, you can use a light spray starch to help it maintain its shape. Just be careful not to overspray, as it can make the yarn feel a bit crunchy.
Conclusion
Creating something with your own two hands is a quiet, powerful act of creativity. Whether you are crafting these delicate crochet bows to adorn your own hair, to tuck into a birthday card as a sweet surprise, or simply to enjoy the process of turning a ball of yarn into a finished accessory, you are participating in a long tradition of makers and dreamers.
Remember that every stitch is progress. If your first bow isn’t quite the shape you imagined, know that your next one will be even better. Crochet is a journey, not a destination, and I am so honored that you chose to share this moment of your creative journey with me. Keep that hook moving, stay inspired, and most importantly, enjoy the beautiful, cozy, and uniquely handmade world you are building one stitch at a time. I can’t wait to see what you create next!