
Introduction
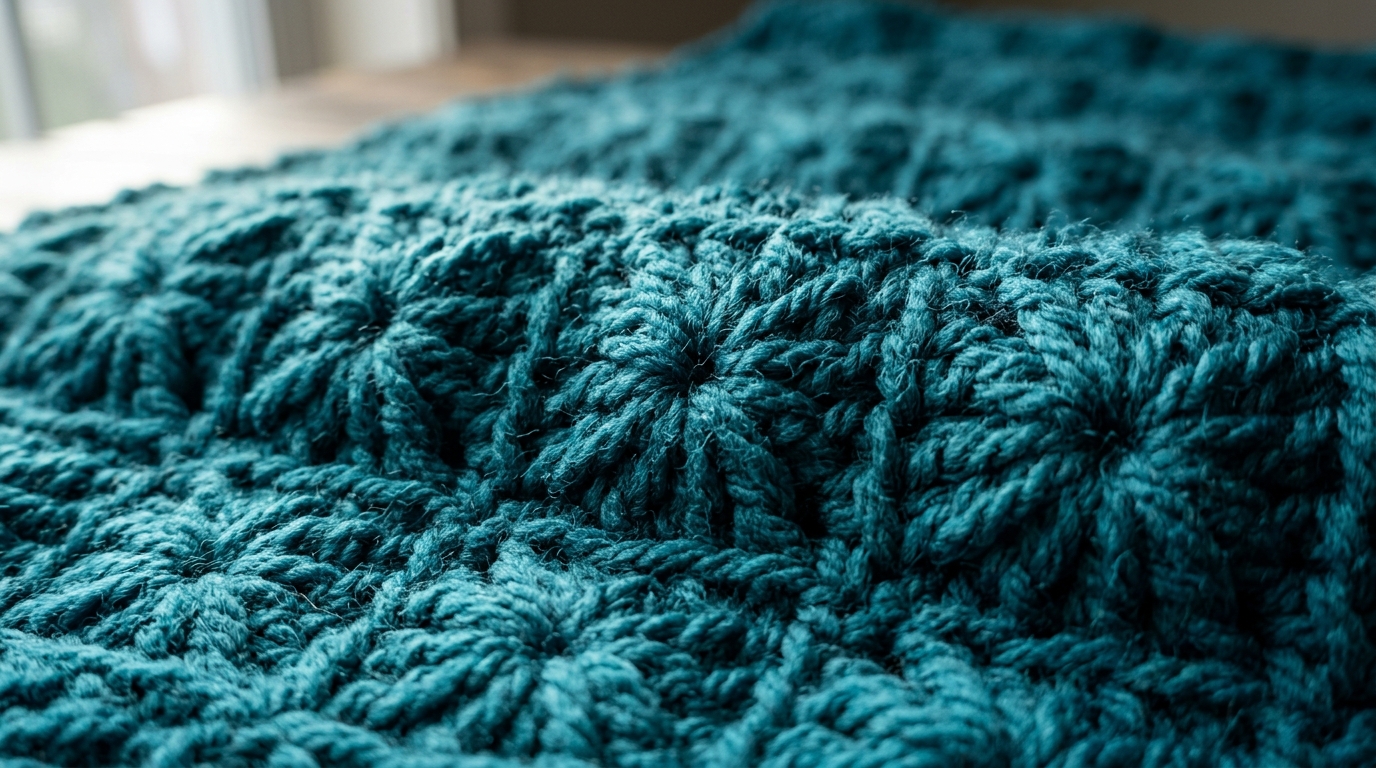
There is something truly magical about picking up a hook and yarn to create a texture that looks like it was plucked right from the night sky. The star stitch, often known for its stunning, blooming appearance, is one of those timeless crochet techniques that every maker should have in their library. It’s dense, it’s squishy, and most importantly, it creates a fabric so thick and cozy that it is practically begging to be turned into a winter blanket or a warm, comforting cushion cover.
If you have scrolled through social media or looked at high-end artisan craft markets, you have likely seen this beautiful stitch and wondered if it was too complicated to master. I am here to tell you that it is much simpler than it looks! While it might seem daunting at first because it requires pulling up multiple loops, the rhythm becomes meditative once you get into the swing of it. In this guide, we are going to walk through the star stitch together, step-by-step. Whether you are a beginner looking to expand your repertoire beyond basic single and double crochets, or an intermediate crocheter hunting for the perfect texture for your next heirloom project, this article will help you master the star stitch with confidence.
Quick Overview
The star stitch is a versatile, decorative pattern that works exceptionally well for projects where warmth and density are priorities.
- Skill Level: Intermediate. While it relies on basic crochet motions, the stitch requires careful tension control and an eye for counting loops.
- Time Commitment: Medium. Because this stitch uses more yarn and creates a thicker fabric than standard stitches, projects work up a bit slower than a simple double crochet blanket.
- Best Use: Winter blankets, thick scarves, textured tote bags, and structural home decor items.
- Why You Will Love It: It creates a beautiful, repetitive celestial pattern that looks professional and intricate. It is remarkably warm, making it a favorite for cold-weather comfort items.
Materials Needed for Your Star Stitch Sampler
To practice the star stitch effectively, I recommend starting with a small swatch before committing to an entire blanket.
- Yarn: Choose a smooth, worsted-weight (medium 4) acrylic or wool blend. Avoid dark colors and black for your first try; a light cream, soft gray, or pastel shade will help you clearly see where to insert your hook.
- Crochet Hook: Use the size recommended on your yarn label, or perhaps go up half a size. The star stitch can become quite tight, and a slightly larger hook than usual helps maintain a flexible fabric.
- Stitch Markers: These are essential for keeping track of your starting and ending points, especially when you are learning the “eye” of the star.
- Scissors and a Yarn Needle: Standard tools for finishing off your work.
Understanding the Anatomy of the Star Stitch
Before we start the pattern, it is helpful to understand that the star stitch is essentially a two-row repeat. You have the “star” row, where you pull up your loops and form the flower-like clusters, and then a “closing” row, where you use half double crochets to anchor those clusters and create the “eyes” of the stars.
It is important to remember that because this stitch is thick, it naturally pulls tight. If you find your edges curling, do not be discouraged! That is part of the learning curve. Relax your shoulders, keep your tension steady, and remember that any slight irregularities will smooth out during the blocking process.
Helpful Notes Before You Start
- Watch Your Tension: This is the most crucial part. When pulling up the loops for your stars, try to pull them up to the height of a chain-two or slightly taller. If you pull them too tightly, the star centers will pucker, and the fabric will become stiff.
- The “Eye” of the Star: In the second row, you will be working into the centers of the star clusters. These are called the “eyes.” Getting used to identifying these spaces is what will take your crochet from beginner to intermediate.
- Blocking is Key: Because of the density of this stitch, the resulting fabric can be slightly wavy or stiff. A gentle steam block or a wet block once you finish your project will make the stars “pop” and give your blanket a professional, luxurious finish.
- Counting: Your stitch count will change during the star row compared to the row of half double crochets. Always count your segments to ensure you haven’t accidentally skipped a loop.
Star Stitch Tutorial: The Pattern
This pattern is written for a simple, flat piece that you can turn into a swatch or a small washcloth-sized square.
Abbreviations:
- CH: Chain
- SC: Single crochet
- HDC: Half double crochet
- ST: Stitch
- YO: Yarn over
Part 1: The Foundation Row
Start by chaining an even number of stitches (for instance, 20 stitches). This will give you enough room to work your clusters.
Part 2: Row 1 (The Star Row)
- Chain 3 (this acts as the first loop).
- Insert hook into the second chain from the hook, YO, and pull up a loop (two loops on hook).
- Insert hook into the next chain, YO, and pull up a loop (three loops on hook).
- Insert hook into the base of the foundation chain, YO, and pull up a loop (four loops on hook).
- Insert hook into the next two foundation chains, YO, and pull up a loop for each (six loops on hook).
- YO and pull through all six loops.
- Chain 1 to essentially “lock” the star. This creates the first star cluster.
- To make the next star: Insert hook into the eye of the previous star, YO, and pull up a loop. Insert hook into the space between the last two loops of the previous star, YO, and pull up a loop. Insert hook into the same space as the last loop of the previous star, YO, and pull up a loop. Insert hook into each of the next two foundation stitches, YO, and pull up a loop.
- YO and pull through all six loops. Chain 1 to lock.
- Repeat from step 8 until you reach the end of the row. End with one half double crochet in the very last stitch to keep your edge straight. Turn.
Part 3: Row 2 (The Closing Row)
- Chain 2 (this counts as your first HDC).
- Work 2 half double crochets into the “eye” of each star cluster across the row.
- When you reach the end, place one final half double crochet in the top of the turning chain from the previous row. Turn.
Part 4: Repeating the Pattern
Repeat Row 1 and Row 2 until your project reached your desired length. Always ensure you count your star “eyes” to make sure you have the same number in every row.
Step-by-Step Explanation for Success
When you are working through the star row, it can feel like you have a million loops on your hook. Don’t panic! The key is to keep your thumb on the hook-side of the loops to keep them from sliding off while you yarn over and pull through.
As you look at your work, the “star” will look like a little flower. The “eye” is that central hole where all the loops met. In the second row, when you work your half double crochets into those eyes, you are essentially defining the shape of the star so it looks crisp and clear on the right side of your fabric. If you aren’t sure if you are in the right spot, give your work a gentle tug; the “eye” is the space that naturally opens up when you pull the surrounding stitches apart.
Common Mistakes to Avoid
- Skipping the Eye: Beginners often accidentally skip one of the five loops needed to create the star. If you end a row with the wrong number of clusters, count your loops again. You must have five loops pulled up plus the one already on your hook to have six loops total before the final pull-through.
- The “Tightness” Trap: If your hook is too small, this stitch becomes physically exhausting to make because of the density. If your hand begins to cramp, take a break and try a hook size larger.
- Twisted Chains: Always double-check your initial foundation chain. If it is twisted, your entire star pattern will skew to one side.
- Uneven Edges: The start and end of each row are where the most mistakes happen. Using a stitch marker in the very first and very last chain of your foundation will help you maintain a clean, straight edge that makes sewing your blanket together much easier later on.
Pro Tips for a Better Result
- Color Transitions: The star stitch looks incredible in variegated yarns, but be aware that the self-striping effect can sometimes hide the definition of the stitch. If you are using a multi-colored yarn, choose one with long, slow color changes rather than a busy, high-contrast speckled yarn.
- The Border: Because the sides of a star stitch project can be a bit uneven, a simple sc border around the entire blanket is highly recommended. It cleans up the edges and gives the project a finished look.
- Yarn Choice: Stick to smooth, non-fuzzy yarns. Mohair or unspun wool can snag in the star cluster loops, making it frustrating to pull your hook through. Save the fancy novelty yarns for a different project!
Variations and Personalization Ideas
Once you have mastered the basic star stitch, you can personalize your projects in several ways:
- Two-Tone Stars: Work your Star Row (Row 1) in one color, and switch to a contrasting color for the Closing Row (Row 2). This makes the stars jump off the fabric!
- Mix and Match: Try alternating one row of star stitches with two rows of simple double crochet. This adds a lovely texture contrast and allows the project to grow faster.
- Baby Blanket Size: Because the star stitch is so thick, it makes a perfect, warm security blanket for a baby. Just be sure to use a soft, machine-washable bamboo or cotton blend to ensure it is gentle on delicate skin.
Care and Next Steps
Once your star stitch masterpiece is complete, treat it with love. Because of the thickness of the stitch, these blankets can hold a lot of water. If you choose to hand wash them, squeeze the water out gently; do not wring or twist the fabric, as this can distort the star shapes. Lay the item flat on a dry towel to air dry, reshaping the stars with your fingers as needed.
If you are machine washing, place the item in a large mesh laundry bag and use a delicate cycle. Following these steps will ensure your hard work stays beautiful for years to come.
FAQ
Is the star stitch difficult for a beginner?
It is considered an intermediate stitch, but it is very manageable if you are comfortable with keeping your tension steady. It is a great “first” textured stitch to learn after you have mastered the basics.
How do I stop my stitches from being too tight?
Ensure you are pulling your loops up to a consistent height—about the height of two stacked chains. Also, do not be afraid to size up your crochet hook by 0.5mm or 1mm compared to what the yarn label suggests.
Can I use the star stitch for sweaters?
Absolutely! While it produces a dense fabric, it is wonderful for winter-weight cardigans or structured pullovers. Just keep in mind that the fabric will have less “drape” than a standard double crochet, so it will be more boxy in silhouette.
Why are my edges uneven?
This is very common with the star stitch. Try to maintain a loose, consistent turning chain at the beginning of each row, and use stitch markers to ensure you are placing your final stitches in the correct space.
Will this stitch use a lot of yarn?
Yes, the star stitch is a “yarn eater” because of the multiple loops pulled through in each cluster. Be sure to purchase an extra skein of yarn if you are planning to turn this into a large blanket or throw.
Conclusion
The star stitch is one of those techniques that makes you look like a complete master of your craft, even when you are just enjoying a quiet afternoon at home. It is a wonderful way to challenge yourself, create something that feels substantial and luxurious, and add a touch of celestial beauty to your living space.
Don’t feel pressured to get it perfect on your very first try. The beauty of crochet is found in the journey of loops and stitches. If your first few stars look a little wobbly, simply pull them out and try again—that is part of the process! Once that “aha!” moment happens and you feel the rhythm of the stiches, you will find yourself wanting to put stars on everything from blankets to pillows. Happy crocheting!