
Introduction
There is something truly magical about taking a simple hook, a strand of yarn, and a bit of focused intention to create something beautiful, functional, and entirely your own. Whether you are picking up a crochet hook for the very first time to learn the basics, or you are an experienced maker looking to refine your technique and discover modern stitches, you have found your creative home. Crochet is more than just a hobby; it is a way to slow down, practice mindfulness, and express your personal style through handmade treasures.
Many people are intimidated by the sheer volume of patterns and techniques available online, but the truth is that at its core, crochet is built on a few foundational principles. Once you unlock these secrets, you gain the freedom to move beyond following a pattern word-for-word and start making decisions that reflect your own taste. In this guide, we are going to explore the best techniques to help you feel confident in your stitches, clean up your edges, and understand how to choose the right materials for a professional, polished finish. You don’t need to be a master to create work that looks incredibly sophisticated—you just need a little bit of guidance, some patience, and the joy of the process.
Quick Overview
This guide is designed for anyone journeying through the world of crochet, whether you are a beginner looking to build a solid foundation or an intermediate crocheter eager to polish your skills. You will learn about selecting the right yarn weight for your projects, understanding how tension affects your finished work, identifying the most versatile modern stitches, and solving common frustrations like uneven edges or messy joins. This information is intended to serve as a reference point you can come back to whenever you are starting a new project. By the end of this guide, you will have a better grasp on how to read patterns, select fibers, and understand the “why” behind the techniques that make handmade items look and feel so special.
Essential Tools and Materials
Before we dive into the techniques, let’s briefly touch on what you need to succeed. While the craft is simple, the quality of your tools can make a significant difference in your physical comfort and the appearance of your work.
- Crochet Hooks: Start with a few ergonomic hooks. These have padded grips that prevent hand fatigue, which is vital if you find yourself crocheting for long, relaxing sessions. For beginners, a size H-8 (5.0 mm) is a wonderful starting point as it is comfortable to hold and easy to read.
- Yarn Selection: Always check the yarn label. It will tell you the recommended hook size and the yarn weight (e.g., Medium/Worsted weight). For learning new stitches, choose a light, solid-colored yarn. Dark colors like black or navy can make it very difficult to see your stitch placement, which leads to unnecessary frustration.
- Stitch Markers: These small plastic clips are your best friends. They help you keep track of your first or last stitch, mark increases, and help you count sequences. Never be afraid to use them—they are not just for beginners; they are a sign of a professional approach to complex patterns.
- Tapestry Needles: These are blunt-ended needles used for weaving in your yarn ends. Having a few different sizes is helpful for securing the tails of your work securely so they don’t unravel over time.
Understanding Crochet Terms and Abbreviations
Crochet terminology acts as the language of the craft. In the United States, we use standard abbreviations that are consistent across almost all written patterns. Understanding these is like learning a shorthand that allows you to fly through instructions. Here are the most common terms you will encounter:
- Ch (Chain): The foundation of most projects.
- Sc (Single Crochet): The most basic, sturdy stitch, perfect for dense fabrics like amigurumi or dishcloths.
- Hdc (Half Double Crochet): A “taller” version of the single crochet that creates a lovely, soft drape.
- Dc (Double Crochet): A staple in blankets and garments, it works up quickly and creates a more open, relaxed fabric.
- Sl St (Slip Stitch): Used to join rounds, move yarn across a row, or create a decorative seam.
- St (Stitch): Refers to the individual loop or foundation space you are working into.
- Yo (Yarn Over): The fundamental motion of wrapping the yarn over your hook to pull through a loop.
Helpful Notes Before You Start
Crocheting is a rhythmic, creative process, but it is also a physical one. If you find your work is curling or seems too stiff, it usually isn’t because you are doing something “wrong”—it is often about the relationship between your hook size and your personal tension.
If you are a “tight” crocheter, your fabric will be stiff and your yarn consumption will be lower. If you are a “loose” crocheter, your fabric will be drapier and you will use more yarn. Neither is better than the other, but your goal is to find a consistency that makes the fabric look uniform. If a pattern says to use a G-6 (4.0 mm) hook but your project looks like it is cinching in, don’t hesitate to reach out to an H-8 (5.0 mm) hook. Your gauge is determined by your hands, and the pattern is merely a suggestion for the final outcome. Always feel empowered to adjust, test, and adapt.
Navigating Modern Stitches and Techniques
The world of crochet is constantly evolving. While the basic stitches are timeless, how we combine them creates the “modern” aesthetic we often see in home decor and boutique-style clothing.
The Importance of the Turning Chain
One of the most common pitfalls for beginners is how to handle the “turning chain” (the extra chains made at the beginning of a row). Does the turning chain count as a stitch? This is a question that plagues even intermediate makers. The key here is consistency. If your pattern doesn’t specify, decide on a method and stick to it throughout the entire project. If you choose to count the turning chain as a double crochet, you must work your very last stitch of the next row into the top of that chain. If you don’t count it, skip it and work only into the stitches themselves.
Working in the Third Loop
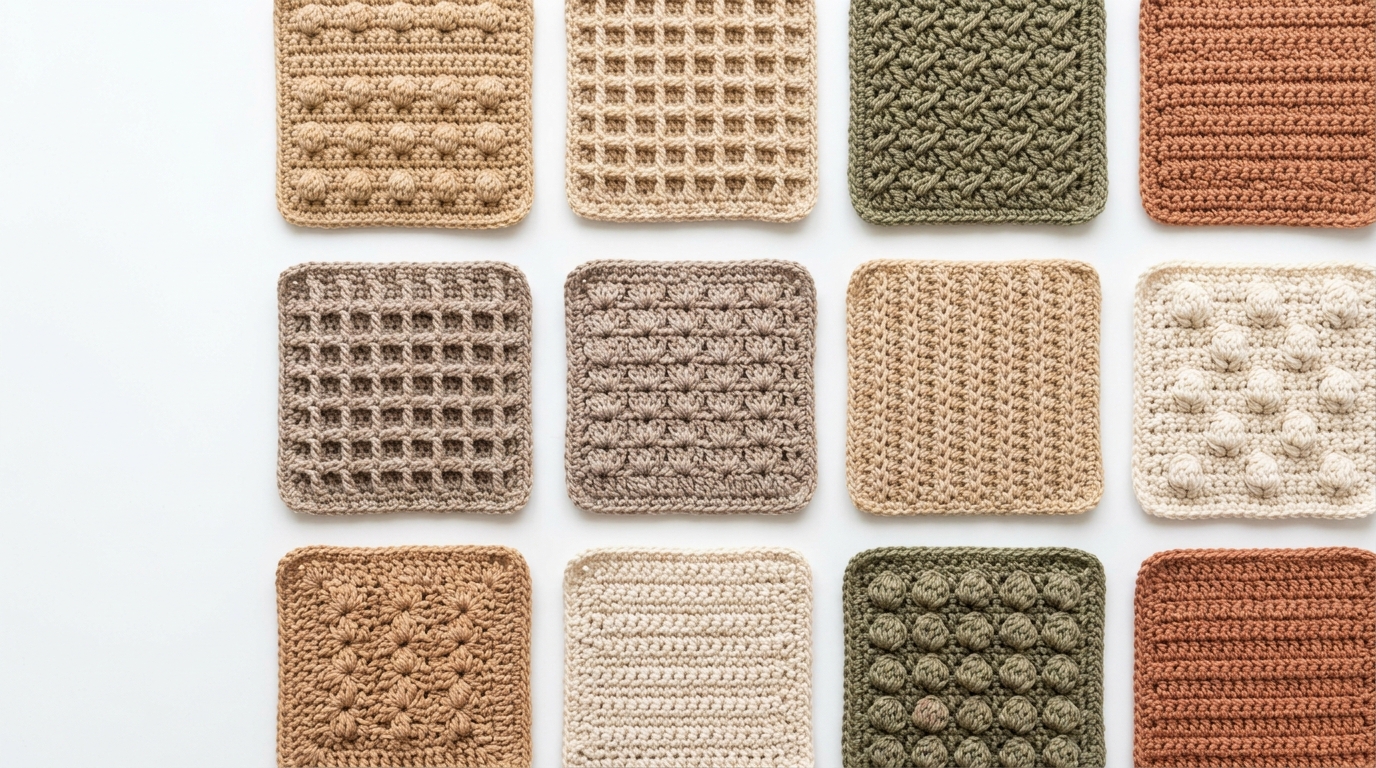
One of the most beautiful “secret” modern techniques involves working into the “third loop” of a half double crochet. When you see a beautiful, knitted-style ribbed look in a crochet piece, this is often the secret. Because a half double crochet has an extra loop created by the yarn-over, you can insert your hook into that back-facing loop to push the front loops forward, creating a crisp, decorative horizontal ribbing.
Achieving Clean Edges
If your rows seem to be growing or shrinking, you are likely missing your first or last stitches. A very simple, effective way to ensure straight edges is to use a stitch marker in the first stitch of every row. When you come back around to complete the row, you will know exactly where that final stitch should sit. This single habit will transform the quality of your finished work more than any other trick.
Step-by-Step Guide to Practice
To master these techniques, set aside a quiet hour and try a small “sampler” square. By working back and forth in different stitches, you build muscle memory.
- Foundation: Start with a simple chain of 20. Do not count the turning chain as a stitch.
- Row 1: Work a row of 20 single crochets. Place a stitch marker in the first and last stitch.
- Row 2: Turn your work. Ch 1, and work back into the 20 stitches.
- Experimentation: After two rows of single crochet, switch to half double crochet for two rows. Watch how the height of your fabric changes.
- Finishing: Try creating a “border” by turning your work 90 degrees and working two single crochets into the side of each row.
By practicing these tiny changes, you will see how tension and stitch height interact. If your swatch starts to look like a trapezoid, you’ve likely dropped a stitch, which is the perfect time to practice “frogging” (taking the stitches out) and trying again. It is all part of the learning phase!
Common Mistakes to Avoid
Even seasoned crocheters make mistakes, but knowing what they are makes them easier to prevent.
- The “Twisted” Chain: When starting a project in the round, your foundation chain can easily twist. Before you join with a slip stitch, lay it flat on a table to ensure all the “V” shapes are facing the same direction.
- Under-estimating Yardage: If you are working on a large garment, always buy an extra skein of yarn. Dye lots can change, and you don’t want to run out of yarn right at the end of a long, time-intensive project.
- Ignoring Gauge: If you are making a hat or a garment that needs to fit, the gauge matters. Take the time to make a 4-inch square, count your stitches, and adjust your hook if necessary. It saves massive amounts of time compared to finishing a sweater that ends up two sizes too small.
- Weaving Ends Poorly: Never just tie a knot! A knot can come undone. Always weave your yarn tails in at least three different directions through the back of your stitches. This locks the yarn in place, even through multiple trips through the washing machine.
Pro Tips for a Polished Professional Finish
If you want your handmade items to look like they came from a high-end boutique, follow these three rules:
- Blocking: This is the most underrated step in crochet. Once your item is finished, dampen it and lay it flat on a towel, pinning it to the exact desired dimensions. As it dries, the fibers relax, the stitches bloom, and the entire piece shifts from looking “homemade” to “handcrafted.”
- Joining Techniques: Instead of using a slip stitch to join seams in garments, try the “mattress stitch” used in knitting. It creates a nearly invisible, flat seam that doesn’t add unnecessary bulk.
- Color Placement: If you are changing colors, try to do it on the final pull-through of the last stitch of your previous color. This creates a much cleaner horizontal transition and hides the “bump” of the new yarn.
Personalization and Creative Styling
The beauty of crochet is its versatility. Once you feel comfortable with these basics, you can start to personalize everything you make. Change your yarn weight to turn a scarf pattern into a chunky, dramatic cowl. Use cotton yarn instead of wool for home items that need to be durable and washable. Or, add buttons, beads, or leather tags to your finished pieces to give them a modern, professional touch. These small, intentional choices reflect your identity as an artist. Crochet isn’t just about following directions; it’s about infusing your patience and care into something that will be used or worn for years to come.
Care and Next Steps
Once your project is complete, take care of it so it lasts. Most wool projects prefer a gentle soak in cool water with a little bit of wool wash, followed by a light squeeze (never wring!) and flat drying. Cotton projects are often more robust and can handle a gentle machine wash, but always check the yarn label for the specific fiber’s needs.
As you move forward, challenge yourself to learn one new technique each month, such as “cables” or “tapestry crochet.” Keep a small notebook of your projects, noting the hook size used, the yarn brand, and any modifications you made. This becomes a beautiful, personal library of your growth as a maker.
FAQ
How do I know if my tension is too tight?
If you are struggling to insert your hook into your stitches, or if your fabric feels stiff and board-like rather than soft and drapable, your tension is likely too tight. Try going up a hook size or consciously relaxing your grip on the yarn.
Why does my work always look like a triangle instead of a square?
This is almost always caused by accidentally dropping stitches at the ends of rows. You can fix this by using stitch markers in the first and last stitch of every single row so you never lose track of where your work begins and ends.
Is it better to learn US or UK crochet terms first?
For the US market, definitely focus on US terms. While there is a lot of overlap, the definitions of stitches like “double crochet” differ significantly between the two. Sticking to one system while you are learning will save you a lot of confusion.
How do I “block” a crochet project at home?
You don’t need fancy tools! Just wash your piece according to the yarn label instructions, roll it in a towel to remove excess water, then pin it to a towel on your bed or floor in the correct shape. Let it air dry completely before unpinning.
How long does it take to learn how to crochet?
The basics—holding the hook and making a basic chain and single crochet—can be learned in an afternoon! However, developing a consistent tension and the confidence to read complex patterns is a journey. Be kind to yourself; every row you complete is progress.
Conclusion
Crocheting is a journey of small, rhythmic steps that culminate in something truly meaningful. Whether you are creating a cozy blanket for a loved one or a simple accessory for yourself, the act of making is an act of self-care. Don’t worry about being perfect; focus on the feel of the yarn in your hands and the quiet satisfaction of seeing your stitches grow. As you continue to explore these techniques, remember that your only goal is to enjoy the process. Keep your hook, your yarn, and a spirit of curiosity nearby—you are capable of creating beautiful things, one stitch at a time. Enjoy your stitching!