
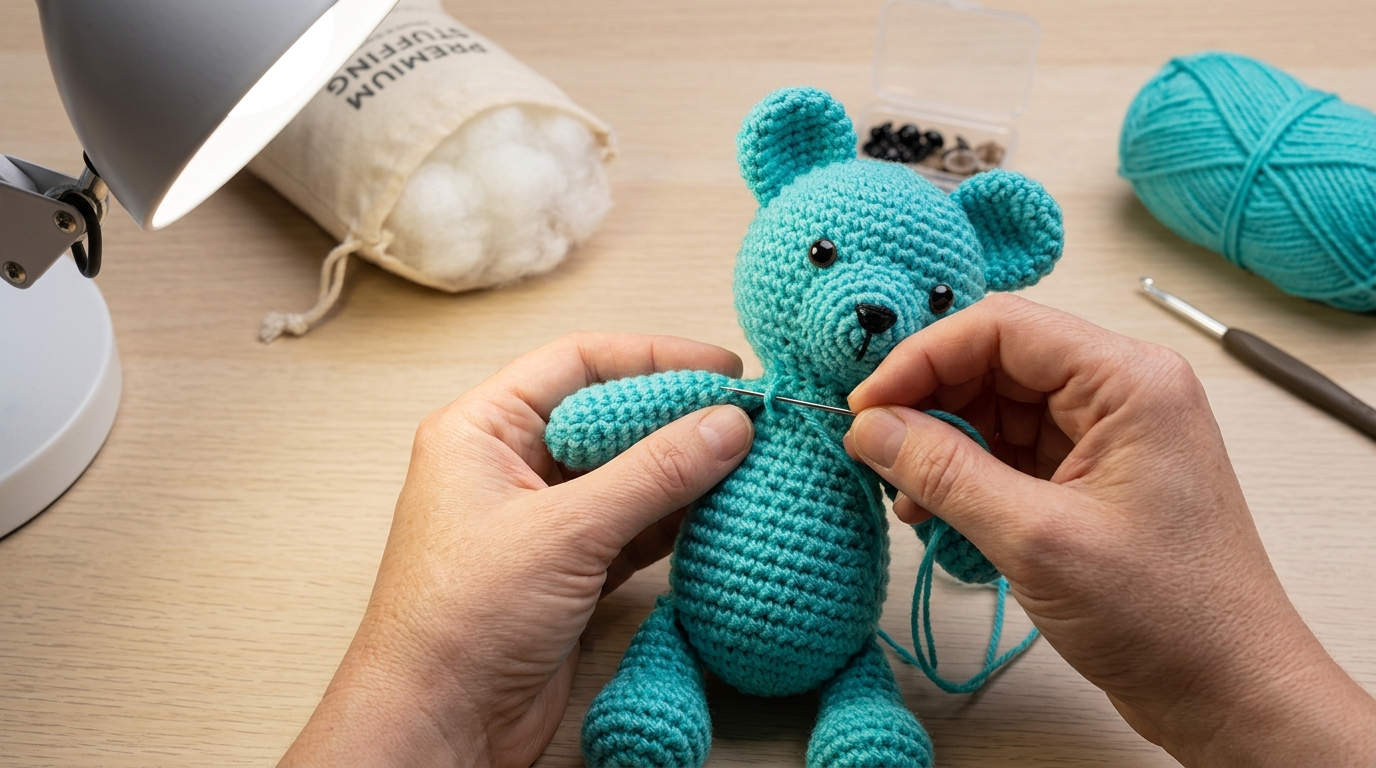
There is something truly magical about taking a ball of yarn and transforming it into a tiny, lovable character. Whether you are crafting a heartfelt birthday gift for a little one or curating a collection of whimsical shelf decor, amigurumi is a deeply rewarding artistic outlet. However, even the most experienced crocheters sometimes find that the “magic” hits a roadblock when it comes time to put the pieces together.
If you have ever felt frustrated by wobbly heads, visible seams, or stuffing that decides to peek through your stitches, you are certainly not alone. The secret to professional-looking amigurumi doesn’t lie in complex stitches, but rather in the intentionality of your assembly and the precision of your stuffing technique. In this guide, we will walk through the gentle art of finishing your projects with confidence. We’ll explore how to achieve seamless joins that look like they were crocheted right into the piece, and how to stuff your plushies for the perfect balance of squishiness and structure. Let’s turn those individual crochet parts into a polished, huggable masterpiece together.
Quick Overview
This guide is designed for both the enthusiastic beginner who is about to sew their very first limb to a body, and the intermediate maker looking to elevate their clean-finish techniques. You will learn:
- The essential physics of stuffing: how to achieve a smooth shape without over-stuffing.
- The “mattress stitch” and its variations for invisible seams.
- How to prepare pieces for sewing so that they don’t shift while you work.
- Troubleshooting common assembly woes like uneven head placement or limp limbs.
Understanding these concepts is the bridge between a handmade project and a handmade heirloom. We aren’t just stitching pieces of yarn together; we are breathing personality and durability into our creations.
Tools of the Trade
You don’t need an expansive toolkit to finish your amigurumi beautifully, but having the right supplies makes a world of difference.
- Tapestry Needles: Look for needles with a bent tip. These are an absolute game-changer, as they allow you to scoop through your crochet stitches without splitting the yarn fibers.
- Stitch Markers: These are not just for counting rows; they are essential for pinning your pieces into place before you sew.
- Fiberfill: High-quality polyester stuffing is the standard. Avoid using cotton balls or scrap yarn if you want a uniform, squishy texture across your plushie.
- A “Stuffing Assistant”: This can be a wooden dowel, a chopstick, or the back of a crochet hook. It helps you push stuffing into tiny corners like ears, tails, or paws.
- Sharp Scissors: A clean cut on your tail ends reduces fraying and makes threading the needle significantly easier.
Essential Concepts for Assembly
Before you reach for your needle, there are a few foundational concepts that will save you time and frustration.
The Importance of Long Tail Ends
Always plan ahead when you finish a piece. If you are going to sew a limb onto a body, leave a tail at least 8 to 10 inches long. It is always better to have a bit of extra yarn to trim later than to end up short in the middle of a seam, which results in having to hide extra knots that can create lumps.
Understanding Tension in Sewing
Sewing amigurumi requires slightly different tension than sewing fabric. Because your “fabric” is made of loops (the crochet stitches), you want to ensure your sewing thread follows the anatomy of the stitch. You aren’t just tying pieces together; you are mimicking the structure of the crochet itself.
The Anatomy of a Join
Your goal in amigurumi assembly is to catch the “V” of the stitch on both pieces. When you look at your crochet, you’ll see the clear loops of the stitches. By passing your needle under these loops on both the body and the limb, you create a connection that is tight, invisible, and very secure.
The Art of Stuffing
Stuffing is an art form. Too little, and your character will look tired and saggy; too much, and the stitches will stretch, causing unsightly gaps where the white stuffing shows through.
The “Little and Often” Rule
The best way to achieve a smooth shape is to add small, pea-sized amounts of fiberfill, rather than large clumps. A large clump will create a “lumpy” appearance, whereas smaller additions allow you to distribute the shape evenly.
Shaping as You Go
Don’t wait until the opening is almost closed to decide on the shape. Use your thumb to massage the fiberfill toward the edges of the piece. If you are stuffing a head, make sure you focus the most density in the center to maintain a round, firm shape.
Avoiding “The White Gap”
If you find your stitches are pulling apart due to stuffing, try this: tighten your yarn tension as you sew the opening closed, and ensure the piece is not over-stuffed. Another pro-tip is to use a slightly smaller crochet hook for the final few rounds of a piece; this keeps the stitches tighter naturally, giving you a smaller hole that is much easier to close securely.
Masterclass in Seamless Sewing
Whether you are attaching an arm, a leg, or a pair of ears, the techniques below will help you hide your work flawlessly.
The Pinning Method
Before sewing anything, use your stitch markers or sewing pins to position the limbs. Spend a few minutes rotating the piece. Does it sit flat? Is the arm placed symmetrically with the other? Once you are happy with the placement, pin everything down. Never sew “in the air.” Pinned pieces stay exactly where you put them, ensuring your hard work isn’t ruined by a limb sliding out of alignment halfway through the seam.
The Whip Stitch Around the Perimeter
For a secure join, align the limb with the body. Insert your needle through one stitch on the limb, and then bring it out through the corresponding stitch on the body. Continue this all the way around the perimeter. As you pull each stitch snug, the seam will practically disappear into the texture of the yarn.
Securing the Knot
Once you’ve closed the seam, do not just snip the yarn. To hide your knot, insert your needle back into the exact spot where the yarn exited, travel through the inside of the stuffed piece, and bring the needle out an inch or two away from the seam. Pull the yarn tail firmly and snip it close to the surface—the tail will “pop” back inside the body and disappear, leaving a clean, knot-free finish.
Common Mistakes to Avoid
Even professionals slip up sometimes! Here is how to keep your projects looking clean:
- Under-stuffing: If your character feels limp, it likely needs more stuffing near the connection points. Check for “dimples” and push more fiberfill into those specific areas.
- Sewing with the wrong yarn: Always use the same color yarn you used to crochet the piece for the assembly. Even the most perfect stitch can be seen if it’s a different color than the body.
- Twisting limbs: Before pinning, hold the piece up to a mirror. Sometimes we get “tunnel vision” while working and don’t notice that a limb is pointing slightly backward or rotated incorrectly until we are already finished.
- Stretching the stitches: When pulling your sewing yarn tight, be careful not to pull so hard that you warp the actual fabric of your crochet. The tension should be firm, not strangulating.
Pro Tips for Polished Results
- The “Double-Check”: Before finally knotting and hiding your tail, hold the piece at arm’s length. Does the weight distribution feel right? Does the expression look balanced? It is much easier to undo one or two stitches now than to take apart a fully assembled character later.
- Symmetry Hacks: If you are trying to place eyes or ears evenly, count the rounds from the top center of the head. Using a scrap piece of contrasting yarn to mark a “center line” down the front of the face can also help you ensure things aren’t drifting to one side.
- Texture Matching: Are you working with fuzzy or chenille yarn? Sewing can be tricky because you can’t see your stitches. In this case, use a running stitch that catches the fabric, and don’t worry as much about specific loops. The texture of the yarn will hide your sewing entirely!
Frequently Asked Questions
How do I stop my amigurumi from feeling “wobbly”?
Wobbliness usually occurs when the connection surface is too small. If you are attaching a head to a body, try to make the neck area slightly wider by increasing the diameter of your final rounds. Also, ensure you are sewing around the entire perimeter of the limb, not just a few stitches in the center.
Can I use super glue for assembly?
While it may be tempting, it is generally discouraged. Glue can harden the area, make it difficult to needle-sculpt, and can potentially discolor or melt certain synthetic yarns. Sewing is a safer, more durable, and washable method.
How do I hide the starting yarn tail?
The easiest way is to weave the starting tail into the first few rounds of your project before you start stuffing. Once you begin adding fiberfill, the stuffing will push that tail permanently to the inside, keeping it tucked away.
My needle keeps getting stuck, what should I do?
If your needle is struggling to pass through, it is likely catching on the stuffing rather than the yarn. Use your fingers to push the stuffing away from the area you are sewing, and try to keep your needle path closer to the surface of the crochet fabric.
Should I sew on facial details before or after stuffing?
It is almost always better to add safety eyes or embroider features before you fully assemble or stuff the head. It gives you the freedom to move your hand inside the piece to secure washers or weave in ends comfortably.
Growing Your Crochet Journey
Mastering the finish of your amigurumi is a milestone in your creative journey. It is the moment you move from simply following a pattern to truly understanding the architecture of your toy. Remember that every maker has their own style, and your assembly technique will become a signature of its own in time.
Don’t be discouraged if your first few attempts at seamless sewing feel a bit fiddly; even the most seasoned designers started exactly where you are today. Take your time, enjoy the meditative process of sewing, and celebrate the fact that you are crafting something unique that will likely be treasured for years. Keep practicing these techniques on small projects like hearts or spheres, and soon, assembly will be your favorite part of the process. You are doing a wonderful job, so pick up that needle and enjoy the satisfying final step of your beautiful handmade creation!