
Introduction
There are few things in this world as heart-warming as the arrival of a new little one. Whether you are prepping for your own growing family, creating a heartfelt gift for a dear friend’s baby shower, or simply wanting to practice your skills on a quick, rewarding project, newborn booties are the quintessential crochet classic. They represent love, warmth, and the gentle touch of a handmade gift that will likely become a treasured keepsake long after the baby has outgrown them.
If you are a beginner, you might feel a little intimidated by the idea of shaping a 3D object, but please rest assured: these little shoes are the perfect introduction to working in the round. They are small, they work up quickly, and they teach you the foundational movements of increases and decreases without requiring the time commitment of a full sweater. For my intermediate friends, this pattern offers a clean, professional canvas that can be easily customized with bows, buttons, or color-blocking to match any nursery theme or personal style. Let’s grab our hooks—it’s time to stitch something truly special.
Quick Overview
- Skill Level: Beginner-friendly.
- Estimated Time: 1 to 2 hours per pair.
- Finished Size: Newborn (fits approx. 3.5 to 4 inches in length).
- Best Use: Baby showers, hospital arrival gifts, or a “just because” present.
- Why You’ll Love It: This pattern uses basic stitches to create a secure, cozy fit, ensuring the booties stay on little feet while remaining soft and breathable.
Materials or Tools Needed
To create these sweet baby booties, you won’t need a massive collection of supplies. Keep your materials simple to ensure the comfort of the newborn’s delicate skin.
- Yarn: Approximately 50 yards of DK or light worsted weight (size 3) yarn. Look for soft blends like cotton-acrylic or super-wash wool—these are gentle, durable, and easy to wash.
- Hook: Size E/4 (3.5mm) crochet hook. This size creates a tight enough fabric that the booty holds its shape without becoming stiff.
- Stitch Marker: Essential for tracking the start of your rounds.
- Tapestry Needle: For weaving in ends securely.
- Measuring Tape: To ensure your gauge matches the newborn size.
- Optional: Small ribbon or fabric flowers for embellishment.
Crochet Terms, Stitches, or Key Concepts
Before we dive into the pattern, let’s get comfortable with the terminology. We use standard U.S. crochet terms for this tutorial.
- Ch (Chain): The foundation of your work.
- Sc (Single Crochet): The workhorse stitch that creates a sturdy fabric.
- Hdc (Half Double Crochet): Slightly taller than a single crochet, providing a nice texture.
- Dc (Double Crochet): Used here to create a bit of height for the ankle section.
- Sl St (Slip Stitch): Used to join rounds and move across stitches without adding height.
- Inc (Increase): Placing two stitches into the same space to widen the structure.
- Dec (Decrease): Combining two stitches into one to narrow the structure.
- St (Stitch): Any individual loop or space created in your crochet.
- Magic Ring (or Adjustable Loop): A technique to start rounds without a hole in the center.
Helpful Notes Before You Start
Tension is the secret to a professional-looking booty. If your stitches are too loose, the booties will be floppy; if they are too tight, they will be uncomfortable for the baby. If you find your work is curling significantly, try going up a half-size in your crochet hook. Always remember to use your stitch marker at the beginning of each round. Since we are working in a continuous spiral for the sole, failing to mark your first stitch can make it very difficult to know where one round ends and the next begins.
Main Tutorial: Cozy Newborn Booties
This pattern is divided into three parts: the sole, the body, and the ankle cuff.
Part 1: The Sole
The sole is worked in oval rounds.
Round 1: Ch 10. 2 sc in the 2nd ch from the hook. Sc in each of the next 7 ch. 5 sc in the final ch. Turn and work along the opposite side of the chain: sc in each of the next 7 ch. 2 sc in the last ch (the same space as the first 2 sc). Join with a sl st to the first sc. (23 sts)
Round 2: Ch 1, 2 sc in each of the first 2 sts. Sc in the next 7 sts. 2 sc in each of the next 5 sts. Sc in the next 7 sts. 2 sc in each of the last 2 sts. Join with a sl st. (32 sts)
Round 3: Ch 1, sc in next st, 2 sc in next st. Repeat from to twice. Sc in next 7 sts. Sc in next st, 2 sc in next st. Repeat from to 5 times. Sc in next 7 sts. Sc in next st, 2 sc in next st. Repeat from to twice. Join with a sl st. (41 sts)
Part 2: The Body
Now we start building the sides upward.
Round 4: Working only in the back loops (BLO) of the stitches from Round 3, sc in every stitch around. Join with a sl st.
Round 5: Ch 1, sc in each stitch around. Join with a sl st.
Round 6: Sc in the first 12 sts. Next, perform your decreases: sc2tog (single crochet two together) 8 times. Sc in the remaining 13 sts. Join with a sl st. (33 sts)
Round 7: Sc in the first 10 sts. Sc2tog 6 times. Sc in the remaining 11 sts. Join with a sl st. (27 sts)
Part 3: The Ankle Cuff
Round 8: Ch 2 (counts as first dc). Dc in each stitch around. Join with a sl st.
Round 9-10: Ch 2, dc in each dc around. Join with a sl st at the end of every round.
Finishing: Fasten off, leaving a 6-inch tail. Weave your tail through the stitches of the final round to secure it tightly. Repeat all steps for the second booty.
Step-by-Step Explanation
Think of the sole as the foundation of a house. By adding stitches in the center of the sides (the “increases”), we create the oval shape necessary to hold a baby’s foot. When we move to the body, moving to the “back loops only” (BLO) is a critical step; it creates a decorative ridge that separates the flat sole from the vertical sides, giving your booties a crisp, tailored look. The decreasing in the front rounds is what creates the “toe” shape of the shoe, pulling the fabric inward so it doesn’t look like a tube. Once you reach the ankle, the double crochet stitches provide extra flexibility, making it much easier to put the booties on a wiggly baby.
Common Mistakes to Avoid
- The Twisted Chain: If your foundation chain is twisted at the start, your entire sole will be crooked. Take a moment to lay it flat before joining.
- Skipping the Marker: Because we are working in rounds, it is very easy to lose your place. Your stitch marker is your best friend—don’t start a project without one.
- Mixing U.S. and U.K. Terms: This pattern is written in U.S. terminology. If you find your bootie looks half the size it should be, you might accidentally be using U.K. methods. Double-check your stitch definitions!
- Inconsistent Gauge: If you switch your tension mid-project (perhaps you are more relaxed on the second bootie), the two will not be the same size. Try to crochet both booties in the same sitting if possible.
Pro Tips for a Better Result
Blocking your finished booties makes a world of difference. Since these are small, you can steam-block them by holding a steam iron about an inch away from the fabric (never touch the yarn directly if it’s synthetic) and gently shaping them with your hands. This softens the yarn and gives the booties a polished, store-bought appearance. Additionally, if you want your booties to stay on “active” babies, consider crocheting a simple chain of 60 stitches and weaving it through the dc round of the ankle to create a drawstring tie.
Variations, Examples, or Personalization Ideas
- Seasonal Flair: For a winter baby, use a fuzzy, chunky-weight mohair blend to create “cloud” booties. For a summer baby, stick to breathable 100% cotton in light, breezy pastels.
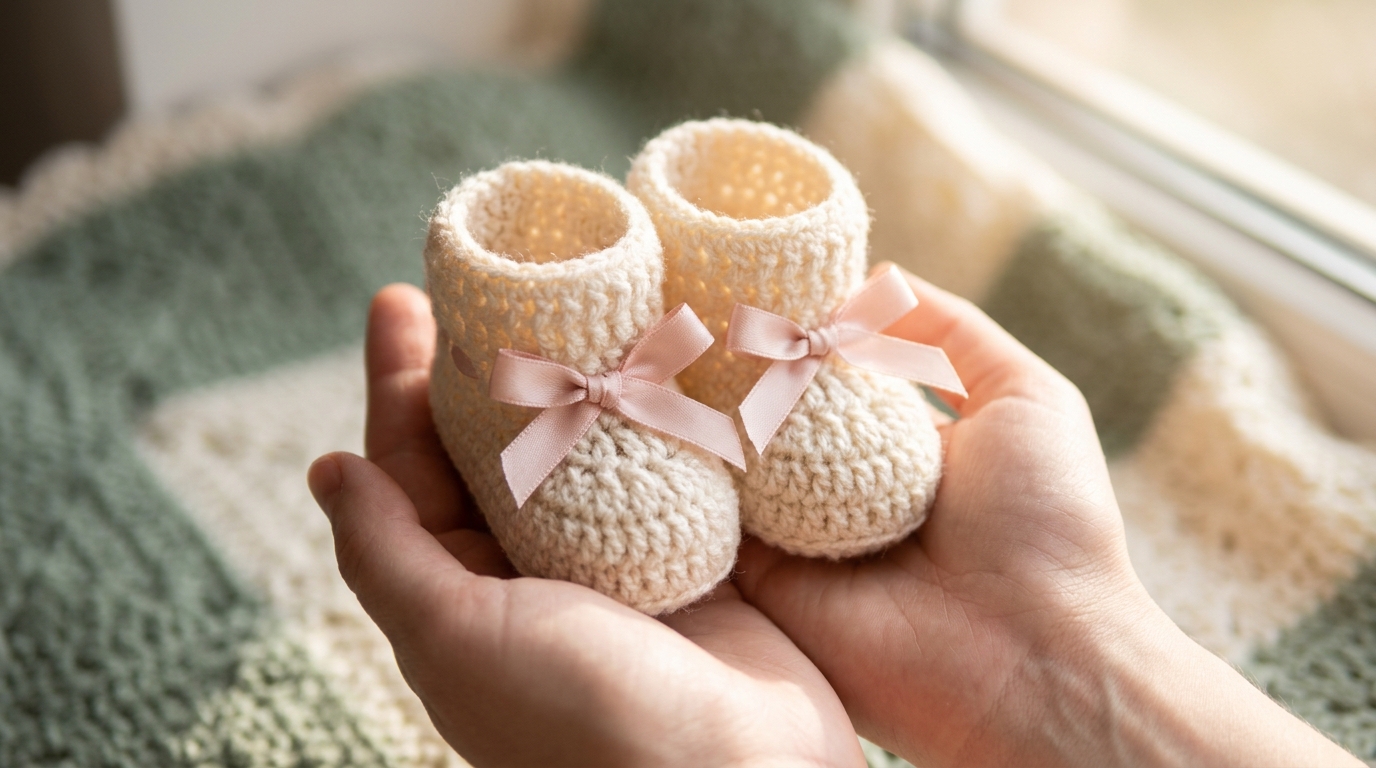
- The Bow Factor: A small satin bow sewn onto the front toe adds an instant touch of elegance.
- Color Blocking: Make the sole one color (a darker shade) and the body another color (a lighter shade) to create a cute “sneaker” effect.
- Gender Neutral: Earth tones like mustard yellow, sage green, or soft cream are wonderful for parents who are waiting to be surprised.
Care, Storage, or Next Steps
Handmade baby items should be treated with love. If you used cotton or acrylic, they are likely machine washable, but I always recommend placing them inside a mesh laundry bag and using a gentle cycle with mild detergent. Lay them flat to dry on a clean towel. For storage, keep them in a breathable fabric bag or a keepsake box out of direct sunlight to prevent the colors from fading. Once you have mastered these, you might feel ready to try a matching baby hat or even a small, simple lovey blanket.
FAQ
How do I make the booties larger for an older baby?
The easiest way to size up is by using a slightly larger hook (like a size F or G) or choosing a thicker yarn. Adding an extra round of increase to the sole will also increase the footprint.
Should I worry about the booties falling off?
Newborns have small ankles. If you find the ankle is too loose, you can easily thread a piece of matching yarn or ribbon through the double crochet stitches at the top to cinch it slightly.
Can I use wool yarn?
Wool is wonderful for warmth, but ensure it is “super-wash” wool. Standard wool can felt or shrink if accidentally placed in a hot dryer, which might ruin your hard work.
Why does my work look like it’s spiraling?
It is normal for stitches to lean slightly in a continuous round. Using a “join with a slip stitch” at the end of each round, as specified in this pattern, helps to minimize this and keeps your lines looking straight.
Is it better to sew on embellishments or glue them?
Always sew! For baby items, buttons, beads, or ribbons should be securely stitched on to prevent choking hazards. Avoid glue, as it can peel or become toxic over time.
Conclusion
Creating handmade booties is more than just a craft project; it is a way of pouring your intention and care into an object that will hold a little one’s first steps. I hope you found this guide helpful and that you feel a surge of confidence with your hook in hand. Remember, every stitch you make carries your signature, and there is no such thing as a “perfect” project—only a perfectly loved one. Take your time, enjoy the process, and congratulations on starting such a lovely, thoughtful tradition. Should you need more inspiration or tutorials, feel free to visit our library of patterns again soon. Happy stitching!