
Introduction
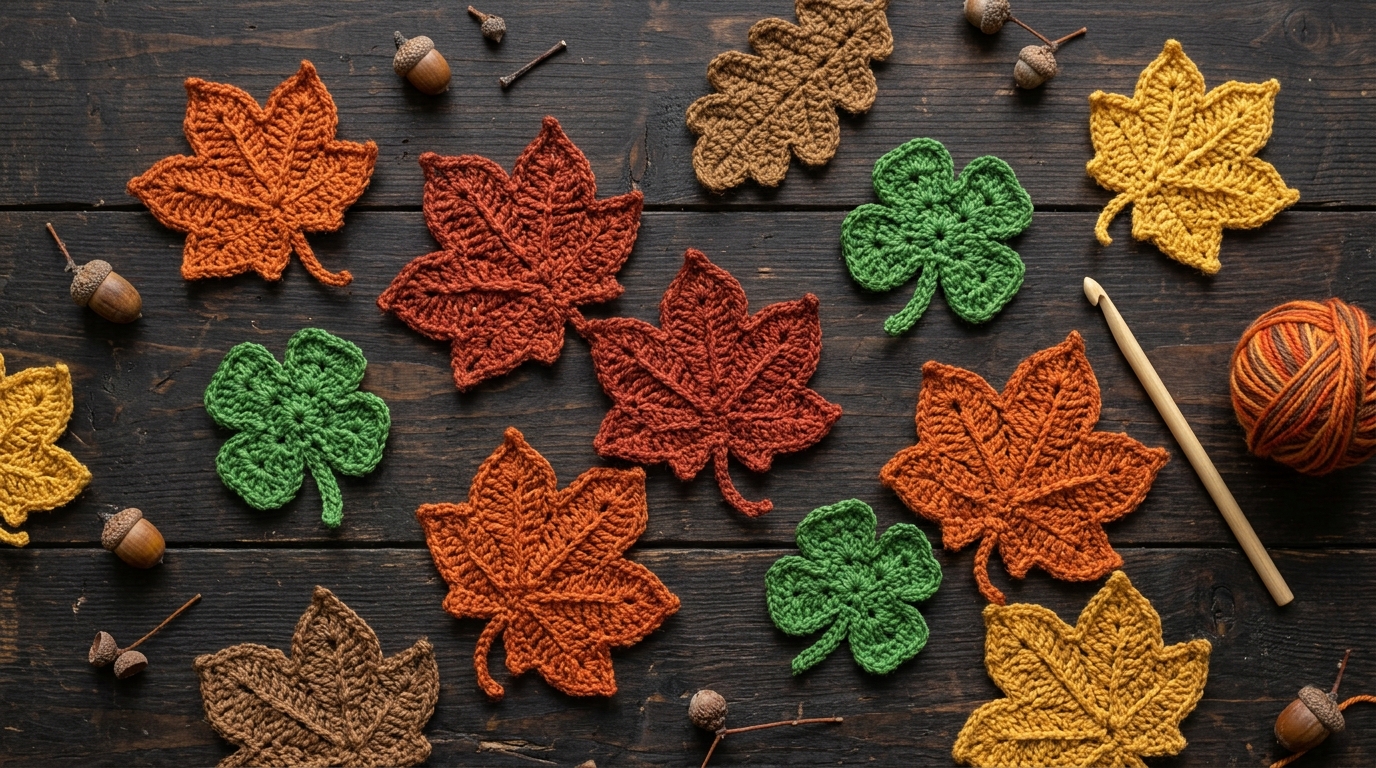
There is something truly magical about bringing the outdoors inside through the rhythmic, meditative art of crochet. Whether the golden leaves of autumn are beginning to crisp at the edges or you find yourself longing for the luck of a springtime clover, these small motifs are the perfect way to add a touch of nature to your craft collection. As a crochet enthusiast, I have found that creating petite, realistic leaves and botanical shapes is one of the most rewarding ways to spend an afternoon. These projects are small enough to complete in a single sitting, making them ideal for using up those leftover yarn scraps that we all seem to accumulate in our baskets.
If you are a beginner, you might feel a little intimidated by the idea of shaping yarn into organic, irregular forms, but I promise that these motifs are much easier than they look. We will focus on simple stitches like single crochet and double crochet to build dimension and movement. For my fellow intermediate crocheters, this is a wonderful opportunity to practice your tension control and experiment with color transitions to get that perfect, seasonal look. By the end of this guide, you will have the skills to create a beautiful stash of autumn leaves and dainty clovers that are ready to be turned into bookmarks, garlands, or lovely appliqués for your favorite sweaters. Let’s grab our hooks and get started on this cozy project together.
Quick Overview
This guide is designed for any crochet lover—from the absolute beginner who is just learning how to hold their hook, to the intermediate crafter looking for a quick and satisfying project. You will learn how to create two distinct motifs: an elegant autumn leaf with a defined center vein and a charming, three-leaf clover. These patterns are perfect for seasonal home decor, DIY gifts, or just a bit of creative play. Because these items are small, they require very little yarn and can be completed in approximately 20 to 30 minutes, depending on your speed. You will walk away with a solid understanding of how to use simple stitch height variations to create natural curves and shapes.
Materials or Tools Needed
To create these botanical motifs, you won’t need much, which is part of their charm. Here is what you should have on hand before beginning:
- Yarn: Medium-weight (worsted/aran) cotton or acrylic blend yarn works best for these motifs. Cotton often provides a crisper, more defined stitch, which is perfect for leaves.
- Crochet Hook: A size H/8 (5.0mm) hook is generally recommended for worsted weight yarn, but feel free to drop down to a G/6 (4.0mm) if you want the stitches to be tighter and stiffer.
- Stitch Markers: These are optional but helpful if you struggle to see your turning stitches.
- Tapestry Needle: For weaving in your ends securely.
- Scissors: Any sharp pair will do.
- Optional: A little bit of fabric stiffener or hairspray if you want your leaves to hold a rigid shape for wall decor.
Crochet Terms, Stitches, or Key Concepts
Before we dive into the pattern, let’s go over the standard U.S. terminology you will be using. If you have been crocheting for a while, these will be second nature, but a quick refresher never hurts:
- Chain (ch): The foundation of most crochet projects.
- Single Crochet (sc): A short, tight stitch that gives the motif structure.
- Half Double Crochet (hdc): A slightly taller stitch that helps with transitions.
- Double Crochet (dc): A taller stitch that creates height and allows the “leaf” to widen.
- Slip Stitch (sl st): Used for closing rounds or moving your hook across a piece without creating a new stitch.
- Fasten Off: Cutting the yarn and pulling the tail through the final loop to finish.
- Weave in Ends: The process of hiding your yarn tails on the back of the work.
Helpful Notes Before You Start
When working on small motifs like these, tension is everything. If you find that your leaves are curling up too much, try using a slightly larger hook, or consciously relaxing your grip on the yarn. If they feel too limp, try a smaller hook. Remember that the “beauty” of a leaf is its slight asymmetry; do not stress if your stitches aren’t perfectly uniform. These are meant to look like pieces of nature, and nature is rarely perfectly symmetrical! Always count your stitches at the end of each row to ensure you haven’t accidentally skipped one or added an extra, which is very easy to do when working with small patterns.
Main Tutorial: Autumn Leaf
This autumn leaf is worked in a way that creates a naturally pointed tip and a sturdy base.
Part 1: Establishing the Foundation
Start with a slip knot on your hook. Chain 10.
- Row 1: Single crochet in the second chain from the hook. Single crochet in the next 2 chains. Half double crochet in the next 3 chains. Double crochet in the final 3 chains.
- The Turn: Instead of turning, you will now work into the other side of your foundation chain. Chain 1 to turn the corner.
Part 2: The Second Side
- Row 2: Work your stitches back down the other side of the foundation chain to mirror your previous work. Double crochet into the same space as your last double crochet. Work 2 double crochet in the next 2 stitches. Work 3 half double crochet. Work 2 single crochet.
- Finishing the Row: Slip stitch into the very base of your starting chain to close the leaf. Fasten off, leaving a 4-inch tail for weaving.
Main Tutorial: The Lucky Clover
The clover is a three-round motif worked in a small circle. It is adorable and very quick to whip up.
Round 1: The Center
- Create a magic ring.
- Chain 1, and work 6 single crochet into the ring. Pull the ring tight to close the circle. Slip stitch into the first single crochet to join.
Round 2: Creating the Petals
- We will make three petals. For each petal: (Chain 3, 2 double crochet into the next stitch, 1 triple crochet into the same stitch, 2 double crochet, chain 3, and slip stitch into the next stitch).
- Repeat this pattern for each of the three petals. You will find that you have a tiny, rounded clover shape at the end. Slip stitch to the base of the first petal to finish. Fasten off.
Step-by-Step Explanation
For the autumn leaf, visualize the first row as the “spine.” By working back down the other side of the chain, you are essentially “wrapping” the yarn around the center, which creates that realistic veining effect. If you find the leaf keeps twisting, place it flat on a table and use your fingers to gently smooth it out. If it still twists, you may need to block it—simply dampen it with a bit of water and pin it to a towel in the shape you want.
For the clover, the “magic ring” is the star of the show. If you are struggling with the magic ring, you can simply chain 4 and slip stitch into the first chain to create a small loop, then work your stitches into that loop instead. The clover relies on the height of the stitches to create that characteristic rounded petal look, so don’t worry if it looks messy while it’s on the hook; once you fasten off and snip the excess yarn, it will tuck into the shape perfectly.
Common Mistakes to Avoid
The most common mistake beginners make with leaf and clover motifs is “gaposis.” This happens when you have a loose tension, causing the holes between your stitches to look wide and messy. To fix this, always make sure you are pulling the yarn snug against the hook after every single stitch. Another frequent issue is miscounting the foundation chain. If your foundation chain is too long, the leaf will look more like a long, thin blade of grass rather than an autumn leaf. Stick to the stitch counts provided, and if you want a larger or smaller leaf, adjust your starting chain by only one or two stitches at a time. Finally, avoid using dark, fuzzy yarns for your first attempt. It is very hard to see your stitch placement with black or mohair-style yarns; stick to smooth, medium-colored cotton until you are comfortable with the shaping.
Pro Tips for a Better Result
If you want your crochet leaves to look truly professional, blocking is your best friend. Even though these are small, taking a moment to pin them out on a foam mat or a clean towel and misting them with water will make the stitches pop and the edges crisp. For variegated yarn, try to time your color changes so that the leaf has a gradient effect—this creates an incredibly realistic autumn aesthetic. When weaving in your ends, use a smaller tapestry needle to pull the yarn tail back through the base of the leaf stitches in the opposite direction of the yarn’s path. This “double-locking” ensures your work will never unravel, even if the leaf is used frequently on an accessory like a bag or a sweater.
Variations, Examples, or Personalization Ideas
The beauty of these motifs is their versatility. For autumn leaf garlands, try using a slightly larger hook to make the leaves feel lighter and airier, and then thread them onto a piece of gold or brown twine. If you are making baby gifts, a single clover appliqué looks precious on a white crochet hat or the corner of a baby blanket. For a more festive touch, you can use metallic thread held together with your yarn to give the leaves a subtle shimmer. You can also experiment with “veining” by using a contrasting color of embroidery floss to sew a single line down the center of the leaf, which adds a lovely, intricate detail that makes the piece look hand-embroidered.
Care, Storage, or Next Steps
Since these items are small, they are quite easy to maintain. If they get dusty, simply toss them into a small mesh laundry bag and wash on a delicate cycle, or hand wash with a drop of gentle soap and lay them flat to dry. To store them, don’t just toss them in a bin where they might get crushed; a small craft organizer or even a clean glass jar looks beautiful on a shelf and keeps your motifs in perfect shape. Next, you might want to try combining these leaf motifs with larger crochet flowers or acorns to create a full woodland-themed wreath for your home.
FAQ
How do I stop my crochet leaf from curling in the middle?
Curling is usually a sign of tension issues. Try using a slightly larger crochet hook size to loosen your stitches. If it continues to curl, you can block the leaf by pinning it flat and steaming it, which will set the stitches in a flat position.
Can I use scrap yarn for these patterns?
Yes! In fact, these motifs are the best way to use up those little bits of yarn left over from larger projects. Since the motifs are small, you can mix and match colors to create a beautiful, multicolored autumn collection.
What is the best yarn weight for realistic leaves?
Medium (worsted) weight yarn is the standard recommendation, but you can use fingering weight yarn with a smaller hook if you want a tiny, delicate leaf. The most important thing is that the yarn is solid-colored or has long color changes for a natural effect.
Are these motifs suitable for beginners?
Absolutely. Both the autumn leaf and the clover rely on basic stitches. If you can chain, single crochet, and double crochet, you have all the skills required to complete these projects today.
How can I attach these leaves to other projects?
The easiest way is to use a whip stitch. Simply thread a tapestry needle with the same color yarn as the leaf and sew it onto your main project by going through the back loops of the leaf and the fabric where you want it placed.
Conclusion
I hope you feel inspired to pick up your hook and transform your yarn stash into a beautiful collection of autumn leaves and clovers. There is such a deep sense of peace that comes from creating something with your own two hands, and these small botanical projects are the perfect way to practice your craft without the pressure of a massive blanket or sweater. Remember, the goal of crochet is to enjoy the process as much as the finished object. Don’t worry about perfection; focus on the rhythm, the texture of the yarn, and the joy of creating something unique. Whether you are adding a clover to a gift for a friend or stringing autumn leaves across your mantle, you are adding a piece of yourself to your home. Happy stitching, and may your hook always find its way!