
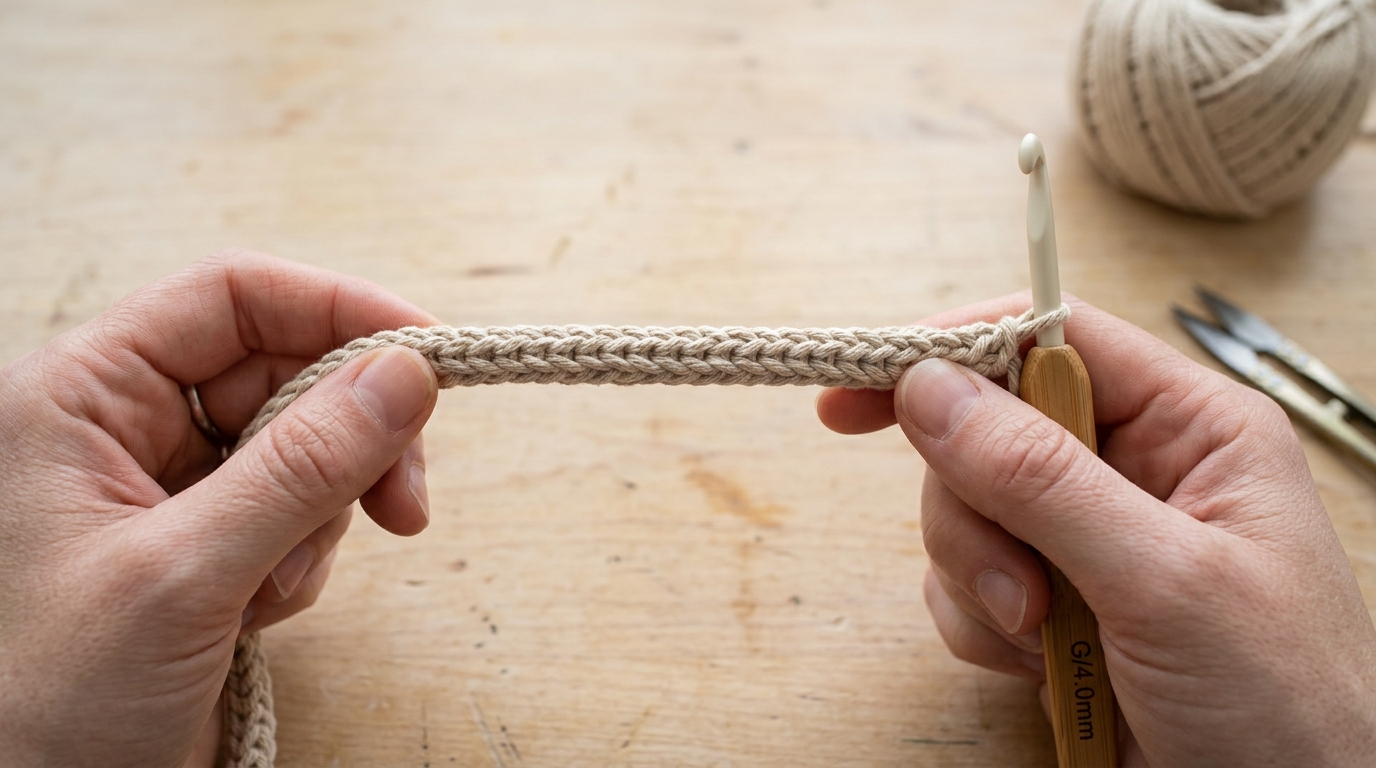
Discovering the Magic of the Crochet I-Cord
We’ve all been there: you’ve poured your heart and soul into a beautiful new crochet project—perhaps a stunning market bag or a chic, minimalist crossbody purse—only for it to fall flat at the very last step. The handles are wobbling, the tension is uneven, or they just look a bit too “homemade” rather than “handmade.” If you are looking for that elusive, professional, and ultra-sturdy finish for your next accessory, let me introduce you to the crochet i-cord.
Often mistaken for a more complex knitting technique, the crochet i-cord is actually a total game-changer for the crochet enthusiast. It is essentially a knitted-look cord worked in the round, resulting in a dense, rope-like structure that is perfect for bag handles, drawstrings, or even unique jewelry pieces. Whether you are a beginner looking to add a polished touch to your first handmade gift or an intermediate maker searching for the most reliable way to create non-stretching, durable straps, this technique will become your new best friend. It is simple, rhythmic, and incredibly satisfying to create. Let’s dive into how you can master this technique and elevate your crochet projects to the next level.
Quick Overview
This guide is designed for both beginners and intermediate crocheters who want to add longevity and style to their work. You will learn the exact mechanics of creating an i-cord using standard crochet stitches, why this method is structurally superior for weight-bearing projects, and how to customize the thickness and appearance of your cords. This isn’t a complex, multi-part garment pattern, but rather an essential toolkit addition that you will find yourself reaching for again and again. It is perfect for anyone who wants their finished projects to look high-end, thoughtful, and professional.
Materials and Tools Needed
One of the best things about the crochet i-cord is its simplicity. You don’t need a fancy gear set to get started.
- Yarn: Any weight is fine, but I highly recommend a smooth, cotton or cotton-blend yarn. Cotton has less stretch than acrylic, which makes for a much sturdier, longer-lasting handbag handle.
- Crochet Hook: Choose a hook that is one or two sizes smaller than what is recommended on your yarn label. Because we want an i-cord to be dense and sturdy, a tighter gauge is our goal.
- Stitch Markers: These are optional but can be very helpful for keeping track of your loops while you are learning the rhythm.
- Tapestry Needle: You will need this for the “finishing” step—weaving in those ends securely is crucial for load-bearing straps.
- Scissors: Just your standard pair to snip your yarn.
Understanding the Structure
The crochet i-cord is, quite simply, a tube of fabric. Unlike a flat strap—which is traditionally worked in rows of single crochet—the i-cord is built by pulling loops through one another in a small, circular sequence. Because it is worked in a continuous “tube,” it resists the curling and stretching that often plague long, flat crochet straps. When you pull on an i-cord, the fibers lock into place, creating a rounded aesthetic that mimics the look of high-quality nautical rope or store-bought accessories.
Helpful Notes Before You Start
Before you pick up your hook, let’s talk about tension. This is the single most important factor in the success of your i-cord. Because you are working with a very small number of stitches (usually just 3 or 4), your tension needs to be consistent to ensure the “rope” looks even all the way through.
- Firmness is key: If you crochet loosely, your i-cord will look gappy and soft. If you are struggling to keep it tight, take a deep breath and consciously pull your yarn just a tiny bit tauter after you pull through each loop.
- The Chain Start: We will be using a foundation chain to anchor our starting loops. Don’t worry if the connection looks a bit strange on the very first round; it will smooth out as you add length.
- Patience: Your first inch might feel a little clunky. That is completely normal! Once you hit that two-inch mark, you will find your rhythm, and the work will start to fly by.
Step-by-Step Tutorial: The Classic Four-Stitch I-Cord
This method creates a substantial, rounded cord that is thick enough for a medium-sized bag handle or a sturdy drawstring.
Step 1: The Foundation
Start with a slip knot on your hook. Chain 4.
Step 2: Picking Up the Loops
Skip the first chain. Insert your hook into the second chain from the hook, yarn over, and pull up a loop. Keep this loop on your hook. Do not yarn over and pull through yet! Repeat this for the next two chains. You should now have 4 loops on your hook (the original slip knot loop, plus the three new loops you just pulled up).
Step 3: Working the Cord
Carefully remove your hook from the 3 leftmost loops. To ensure they don’t unravel, you can pinch them or slip a stitch marker through them. Now, with only the first loop on your hook, yarn over and pull through that one loop. Re-insert your hook into the second loop, yarn over, and pull through. Repeat for the third and fourth loops. You should have 4 loops on your hook again.
Step 4: The Continuous Cycle
This is the rhythm you will follow for the rest of your cord:
- Remove the hook from the 3 loops.
- Hold them steady.
- Yarn over and pull through the single loop on the hook.
- Replace the hook into the next loop, yarn over, and pull through.
- Repeat until you have 4 loops on the hook.
Repeat this process for your desired length.
Finishing Your I-Cord
Once your strap or handle has reached the desired length, it is time to bind off so it doesn’t unravel. When you have your 4 loops on your hook, instead of removing them, simply yarn over and pull through all 4 loops at once. Chain one, fasten off, and leave a long tail of yarn. You will use this tail to sew your handle into your project. Use your tapestry needle to whip-stitch the ends securely, and weave your ends back into the center of the tube so they are completely invisible.
Common Mistakes to Avoid
Even professionals slip up! Here are the most common hurdles for this technique:
- Tension Fatigue: If your hands start to hurt, you are holding the cord too tightly. Lean back, drop your shoulders, and relax your grip. The cord should be dense, but not stiffened by white-knuckled tension.
- Twisted Loops: If your i-cord starts to look spiraled or lopsided, check to make sure you are picking up your loops in the correct, consistent order every single time.
- Inconsistent Loop Size: If one side of your cord looks wider than the other, you are likely pulling one of your loops larger than the others. Try to keep the loop on your hook consistent in size before you pull through.
- Ignoring the Yarn Label: For weight-bearing handles, avoid using single-ply or lace-weight yarns, which can snap under pressure. A sturdy worsted-weight cotton is the gold standard for bags.
Pro Tips for the Best Results
- Double Up: If you want an extra-thick handle for a heavy market tote, work a 6-stitch i-cord instead of a 4-stitch.
- The “Core” Trick: For a bag handle that absolutely will not stretch, you can feed a piece of thick cotton twine or nylon rope into the center of your i-cord as you crochet. Simply work your stitches around the rope, letting the cord grow over the core. This is a pro-level finish for professional-looking bags.
- Blocking: Yes, you can block an i-cord! If it looks a little bit bumpy, lay it out on a blocking mat, spray it lightly with water, and gently tug it to even out the stitches. Let it dry completely before attaching it to your project.
- Color Blocking: Use two different colors of yarn for a twisted, rope-like effect inside the i-cord structure.
Variations and Color Ideas
The crochet i-cord doesn’t have to be limited to handles!
- Jewelry: Experiment with a 2-stitch i-cord using embroidery floss or fine silk thread for delicate, minimalist bracelets or necklaces.
- Home Decor: Create ultra-long, chunky i-cords using blanket yarn to weave into baskets or use as unique, modern curtain tie-backs.
- Garments: Use a thin, 3-stitch i-cord to create custom-fit drawstrings for hoodies or waistbands on crochet skirts.
- Seasonal Accents: For a festive touch, mix a strand of metallic thread in with your primary yarn to give your handles a subtle sparkle for the holiday season.
Care and Next Steps
To keep your i-cord handles looking crisp, spot-clean them with a damp cloth if they get dusty. If the bag needs a full wash, place it inside a mesh laundry bag and wash on a gentle cycle, then lay flat to dry. Avoid hanging the bag to dry, as the weight of the wet fabric can pull on the handles and cause them to stretch, even if they are well-made.
Your next steps? Practice! Start with a 12-inch “practice cord” using scrap yarn. Once you feel that satisfying, repetitive rhythm, you will be hooked. You’ll start seeing potential handles on every bag pattern you encounter.
FAQ
How do I stop my i-cord from looking twisted?
Twisting is usually caused by picking up the loops in a slightly different sequence each time. Focus on keeping the cord straight as you pull your loops through. It helps to keep the “working” part of the cord positioned clearly in front of you.
Can I make an i-cord with a larger hook?
While you technically can, I don’t recommend it. A large hook creates large loops, which lead to a loose and flimsy cord that won’t hold up well as a handle. Always size down your hook to ensure the density required for a sturdy strap.
How long should my bag handles be?
For a shoulder-carry bag, 18 to 22 inches is usually standard. For a crossbody bag, consider 40 to 45 inches. Remember that crochet often hangs slightly lower than fabric because of the weight of the yarn, so it’s better to go a little bit shorter than you think you need.
Why is my i-cord so thin?
You are likely using too few stitches. Start with 4 or 5 stitches for a medium-thickness handle. If it’s still too thin, try a bulkier yarn or increase to a 6-stitch base.
Can I do this with acrylic yarn?
You absolutely can, but be aware that acrylic has a natural “memory” that tends to stretch more than cotton. If you use acrylic, make sure you crochet firmly, and consider adding a non-stretch core inside the cord to prevent the strap from sagging over time.
Conclusion
There is something so incredibly satisfying about the “aha!” moment when you realize you’ve mastered the crochet i-cord. It turns an ordinary hobby piece into a sophisticated, wearable accessory that you can be proud to carry. Whether you are using it to finish a birthday gift for a dear friend, adding a chic handle to your favorite summer tote, or just experimenting with new techniques to sharpen your skills, I hope this guide helps you feel confident and inspired.
Remember, every stitch is a chance to learn something new. Don’t worry if your first few rounds look a little wobbly—that is just part of the journey. Keep your tension firm, your rhythm steady, and most importantly, have fun with your yarn. Happy hooking, and I can’t wait to see the beautiful projects you create with your new favorite technique!